Adding new sheets in Revit is one of the most repetitive tasks, especially when working on big scale projects.
Read the article below to learn a practical trick on how you can create multiple sheets with just a few clicks.
Create a New Sheet – Standard Method
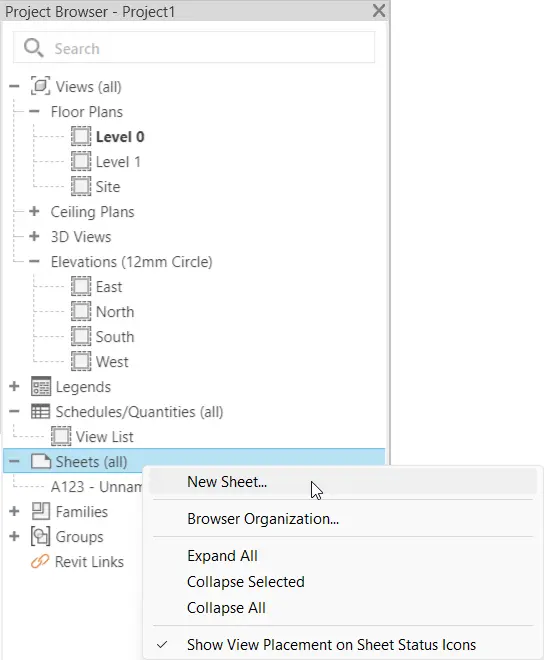
Revit offers two ways on how to create new sheets. It is a straightforward method, but it allows you to create only one sheet at a time. To do this, go to Project Browser, right-click on Sheets (all) and select New Sheet…
The second option is accessed through the View tab. Under Sheet Components, click on Sheet.

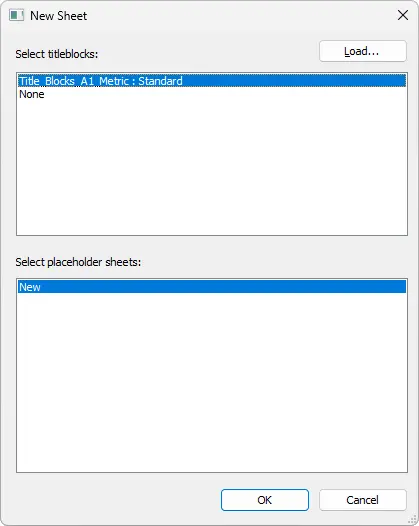
Both of these options will open a new dialog box where you can select titleblocks and placeholder sheets. Confirming the choice by clicking OK, will result in creating a new sheet. Repeat the process until you have the desired number of new sheets. To rename sheets, go to Project Browser and rename each sheet individually.
Create Multiple Sheets at Once
If you are working on a large-scale project, preparing sheets in a previously described way can be a time-consuming task.
To speed this up, you can use the BIM Query. BIM Query is an integrated Excel-like spreadsheet that allows you multiple options for working on your model. It allows you easy editing of Type and Instance Parameters, Color Coding elements by its properties, editing Schedules as well as creating new Family Types and creating new Sheets. And these are just a few examples. BIM Query allows you to edit properties in a built-in spreadsheet editor, for easy editing (including usage of formulas) you can also export the spreadsheet and open it directly in Excel. Once the Excel file is updated, you can load it back and apply changes to your Revit model.
The built-in spreadsheet editor also includes Excel functionalities for sorting, filtering and copying parameters. You can learn more about BIM Query here.
More examples on how to use BIM Query:
– Analyze Revit Model with Excel
Creating/Editing Multiple Sheets with the Help of BIM Query
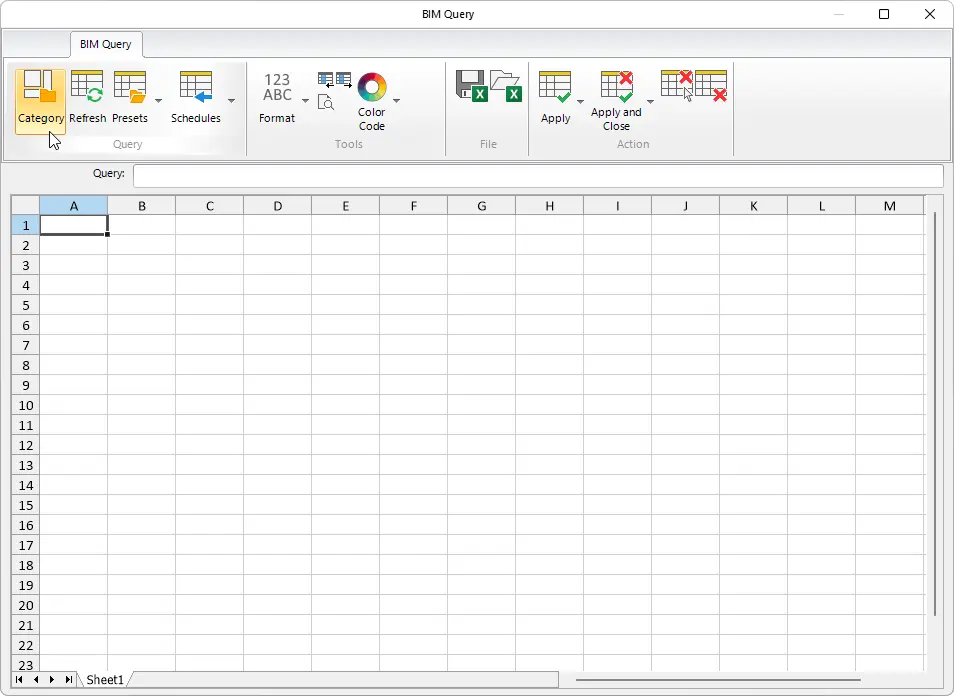
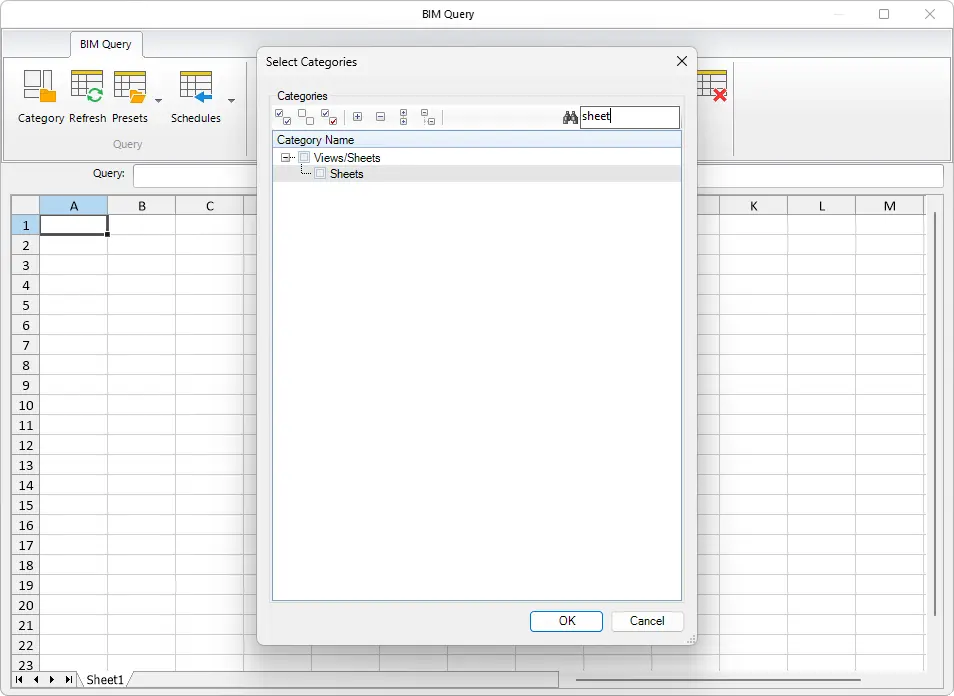
To open BIM Query, go to Kobi Toolkit tab and under BIM Manager, select BIM Query. A new dialog box comes up. Here you can select a Category with which you want to populate the Excel-like spreadsheet.
In our case, we currently have only one Sheet created, but we want to add multiple new ones. To do this, you can mark the row you would like to copy and press CTRL+C or right-click and select Copy.
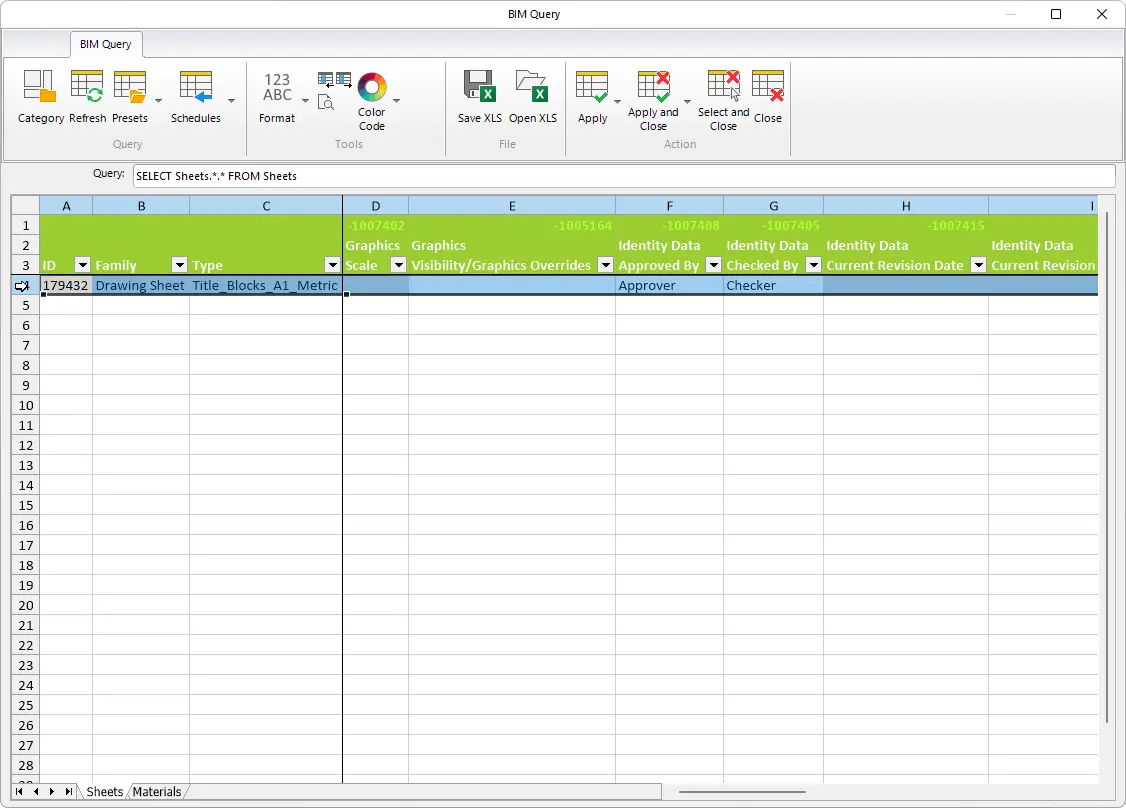
Select the number of rows (the number of new sheets you wish to create) and press CTRL+V or right-click into selected area and select Paste.
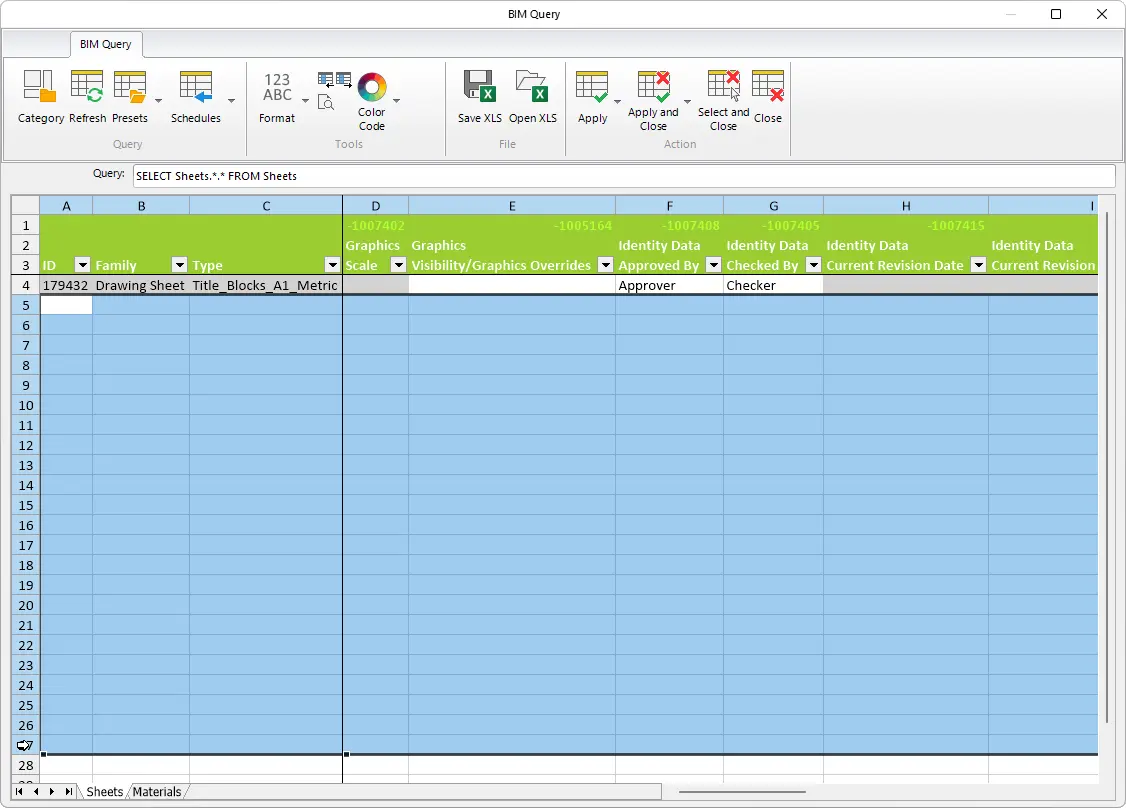
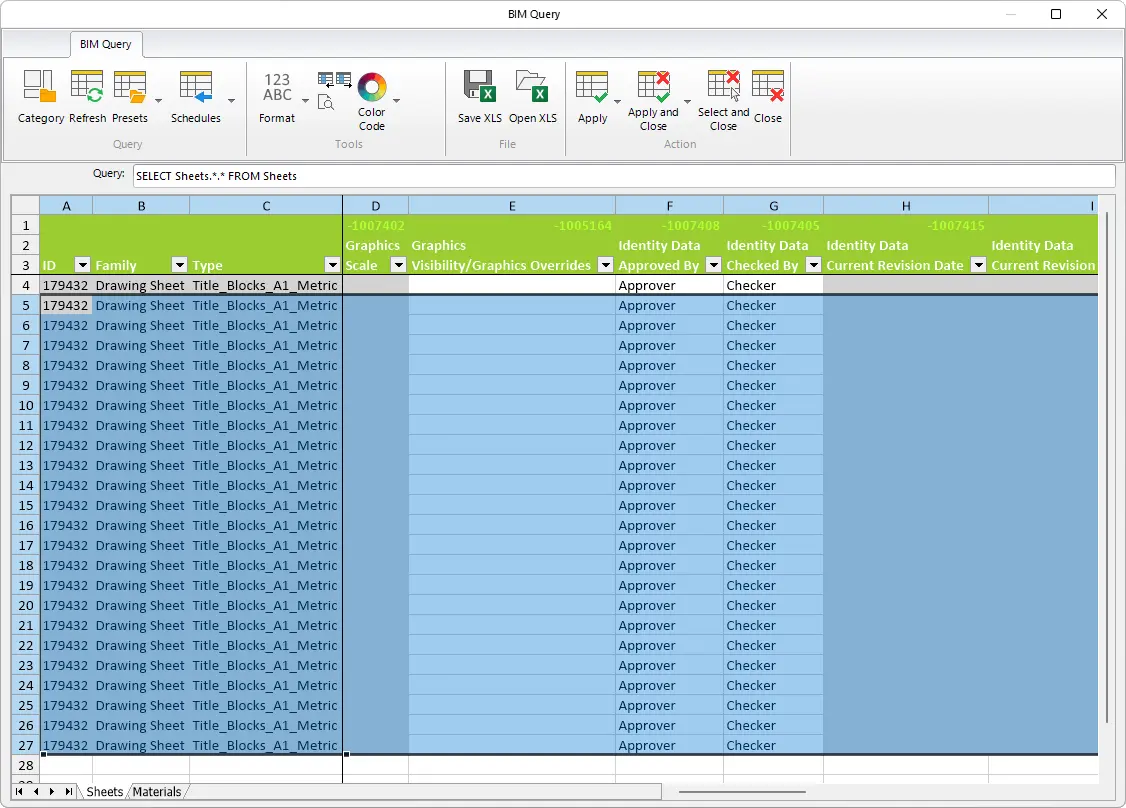
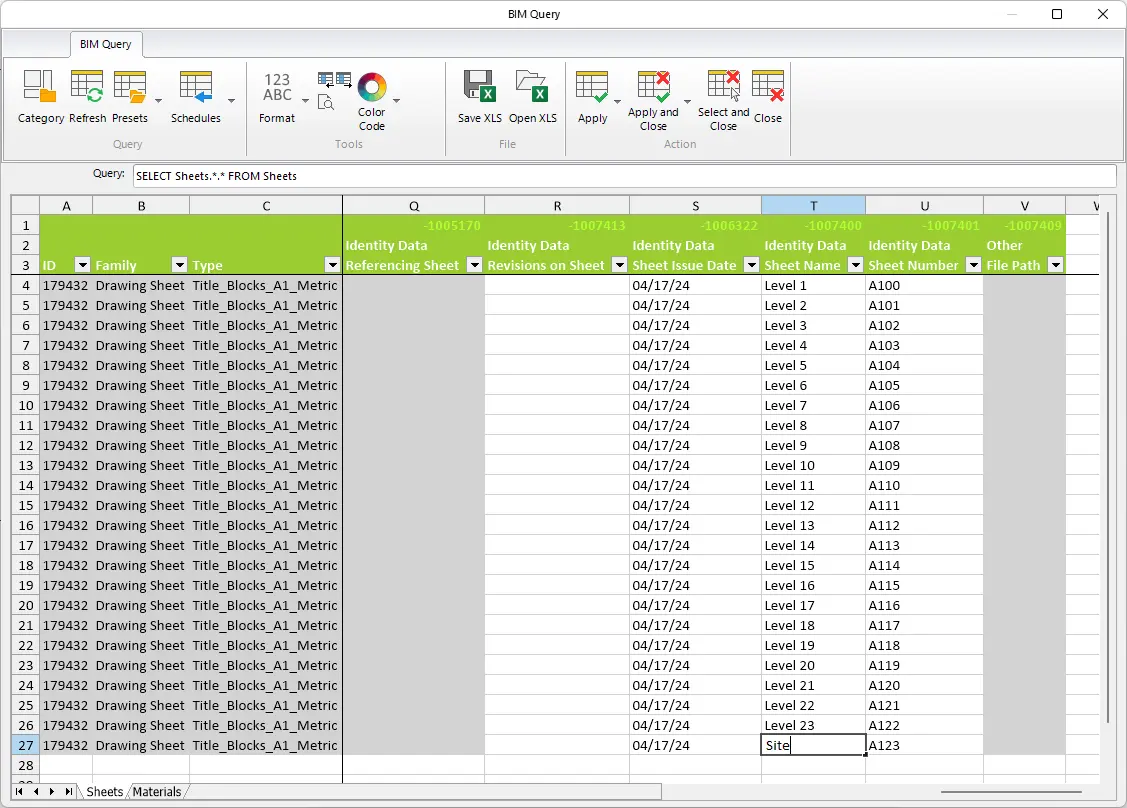
Rename the ID column of the copied elements to “New” (Rename the first one and drag the cell down to apply the same name to others). Other properties can also be edited directly in the spreadsheet. On the right side of the table, you can find and edit data that is displayed on the spreadsheet (Approved by, Checked by, Designed by, Drawn by, Sheet Issue Date, Sheet Name and Number, etc.). The cells colored in gray cannot be edited.
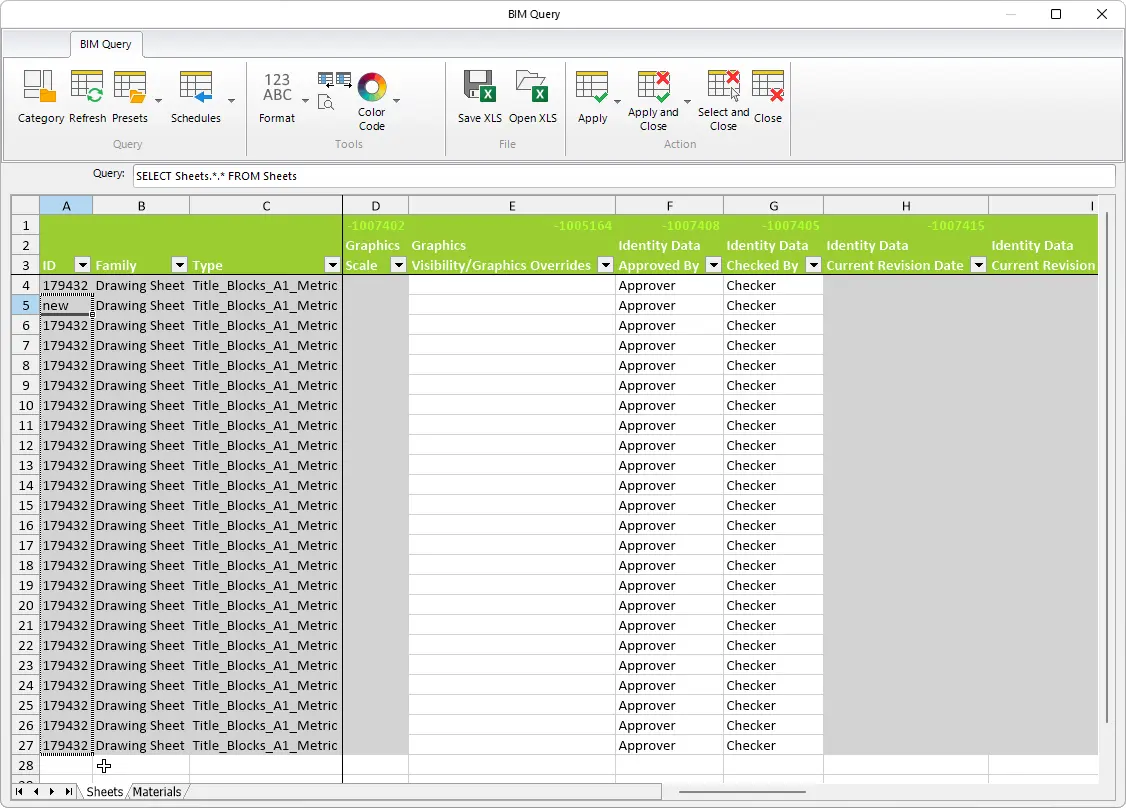
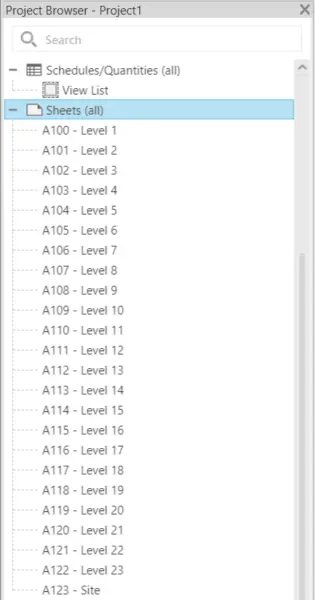
The editing of spreadsheet cells works in the same way as in Excel. Dragging the cells with values will create sequential numbers (1,2,3,4,5…). When you are happy with your changes, simply select Apply and Close. Newly created sheets will appear in the Project Browser.
Kobi Toolkit for Revit includes over 40 productivity tools. Download a free trial here.

