Revit views serve as the windows into your building model. However, managing them efficiently, especially across multiple projects, can be challenging. This article explores the process of creating view templates in Revit, enabling you to maintain consistent and well-organized views.
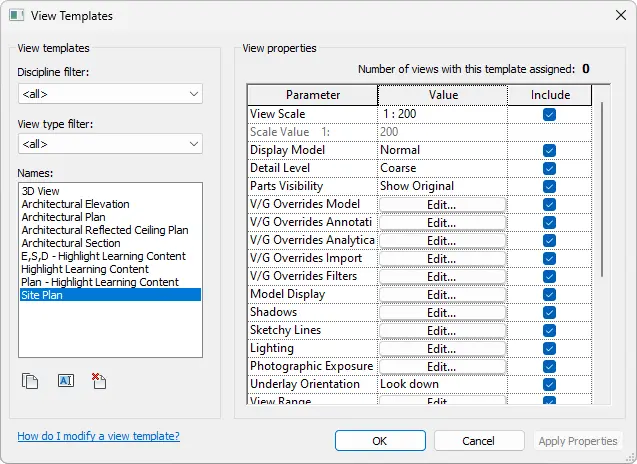
Table of contents:
- About View Templates
- How To Create a View Template Based on An Existing View Template?
- How To Create a View Template Based on The Settings of a Project View?
- How To Create a View Template from The Graphic Display Options Dialog?
- How To Prepare 3D Views and Create New View Template?
- How to Delete View Templates?
- Copy View Templates to another Revit project
About View Templates
View Templates have defined view properties, such as view scale, discipline, detail level, and visibility settings. They are used to apply standard settings to views.
Before you start creating view templates, think about how you use views. Break it down by floor plans, elevations, sections, 3D views, and so on. Within each type, what styles do you find yourself using frequently? For example, an architect may use many styles of floor plan views, such as power and signal, partition, demolition, furniture, and enlarged.
You can create a view template for each style to control settings for the visibility/graphics overrides, view scales, detail levels, graphic display options, and more.
Several views are already provided within Revit, but you can adapt them or create your own ones.
How To Create a View Template Based on An Existing View Template?
1. Click the View tab, go to the Graphics panel, select View Templates drop-down, and click on Manage View Templates.

2. In the View Templates dialog box, you can filter the views by discipline and view type. Templates for each view type contain different sets of view properties. Select the appropriate view type for the template you are creating and click on the Duplicate button ![]() .
.

3. The Rename dialog box opens up. Here you can enter a name for the template, and click OK.
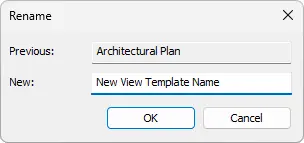
4. Modify view template properties values as needed.
How To Create a View Template Based on The Settings of a Project View?
1. In the Project Browser, select the view from which you want to create the view template.
2. Click the View tab, go to Graphics panel, select View Templates drop-down, and click on Create Template from Current View.

3. In the New View Template dialog box, enter a name for the template, and confirm it by clicking OK.
4. Modify view template property values as needed. See View Template Properties.
The Include column allows you to select the properties that will be included in the view template. You can clear the Include option to remove properties from the template. For properties that you do not include in the view template, you do not need to specify a value. These view properties will not be overridden when you apply the view template.
5. Click OK to save changes.
How To Create a View Template from The Graphic Display Options Dialog?
1. On the View Control Bar, click Visual Style to open Graphic Display Options.

Note: The new view template will reflect the view type of the current view.
2. In the Graphic Display Options dialog box, you can define the options as desired.
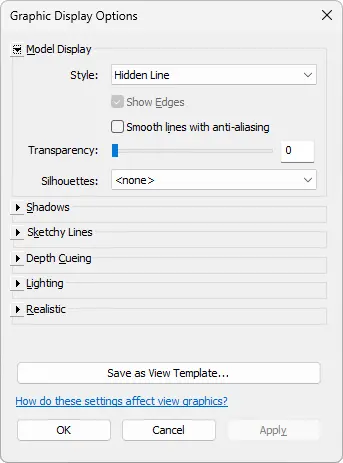
Learn more about Graphic Display Options here.
3. After you are happy with your changes, click Save as View Template.
4. In the New View Template dialog box, enter a name for the template, and confirm it by clicking OK.
5. Modify view template property values as needed. See View Template Properties.
The Include column allows you to select the properties that will be included in the view template. You can clear the Include option to remove properties from the template. For properties that you do not include in the view template, you do not need to specify a value. These view properties will not be overridden when you apply the view template.
6. Click OK to save changes.
How to Prepare 3D Views and Create New View Template?
Read more here.
How to Delete View Templates?
Copy View Templates to Another Revit project
You can copy View Templates and transfer them to another project. You can do this by using Copy Standards, which is part of the Kobi Toolkit for Revit.
To access Copy Standards, go to the Kobi Toolkit tab and under BIM Manager panel, click on BIM drop-down and select Copy Standards.
In the dialog box, you can select View Templates (as well as Details, Materials, Legends, and Schedules) you wish to copy to a different Revit project. Select View Templates (and other elements) you wish to copy and select OK.
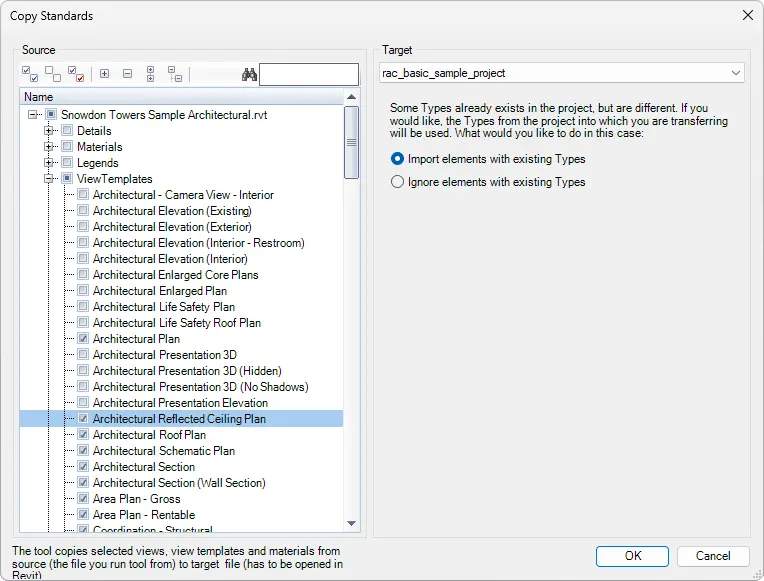
You can download a free trial of Kobi Toolkit here!

