Revit elements can be reviewed and edited in two ways:
- Directly
- Or through schedules
But what if you could combine it with Excel?
In the video below we will show you, how you can combine Revit analysis with Excel functionalities.
Example 1: How to check for unconnected wall height in Revit?
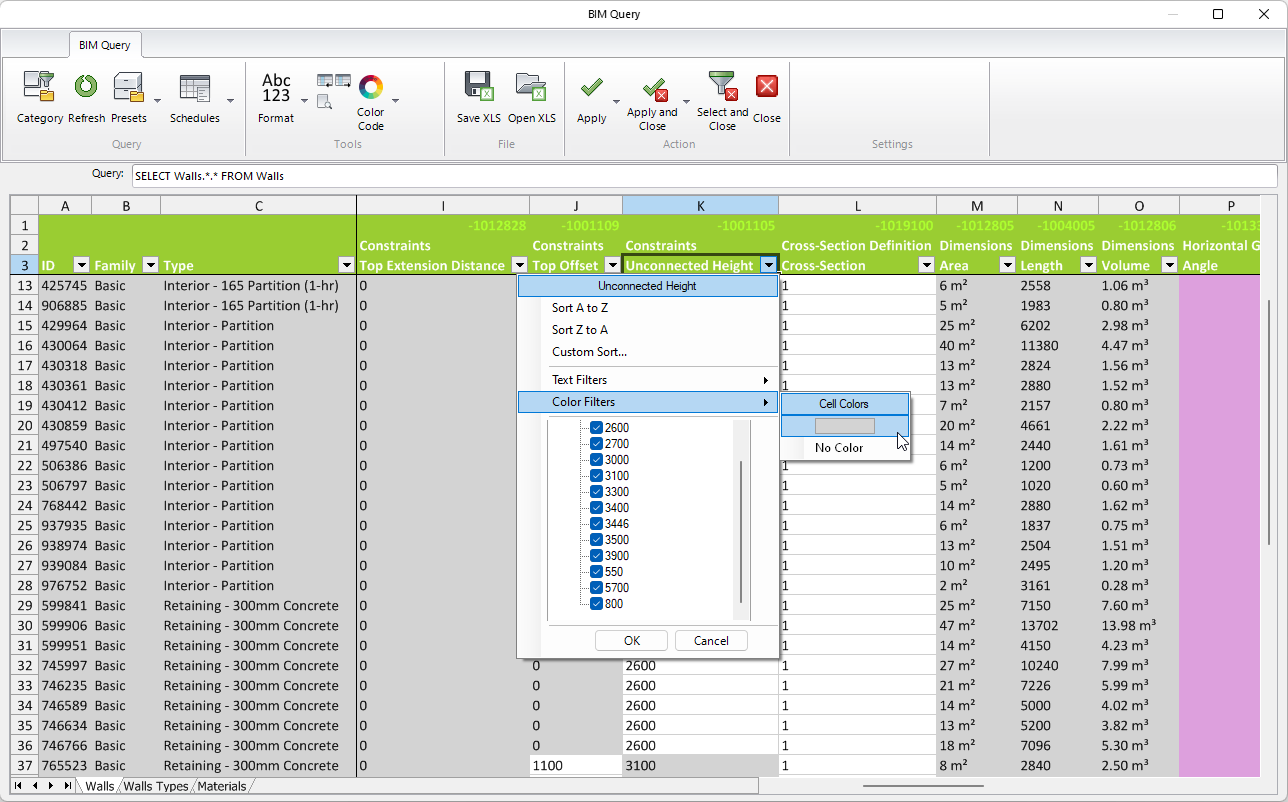
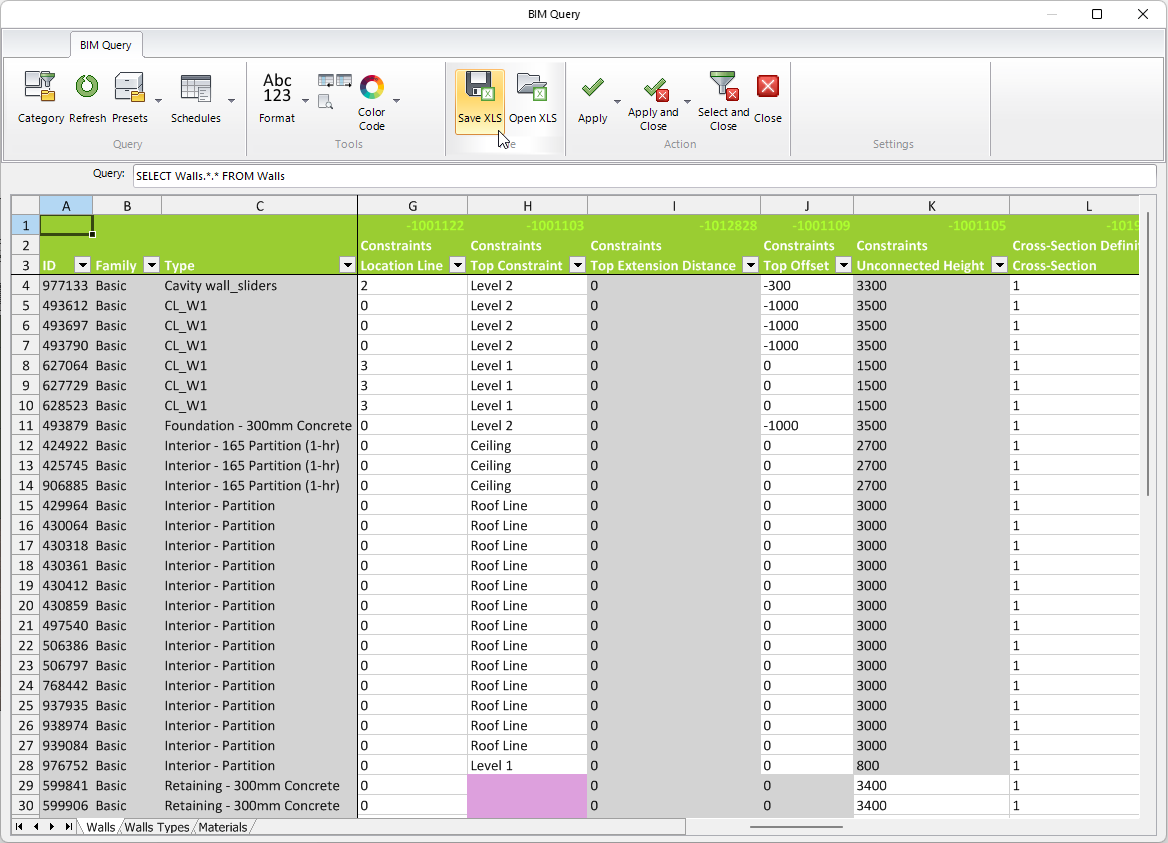
Option 1: Benefit from color filtering in BIM Query.
You can find all the walls with unconnected height, by filtering the “Top Constraint” by color. The purple color indicates, that these walls do not have the top constraint.
Option 2: Use Excel and filter cells by their background color.
First, we save the BIM Query spreadsheet and open it in Excel.
In Excel we insert a new column and give it a name.
Under “Formulas” select “Define Name”. Here you can define a name, for instance “BackgroundColor”. Under “Refers to” use the formula = GET.CELL(38,K4)
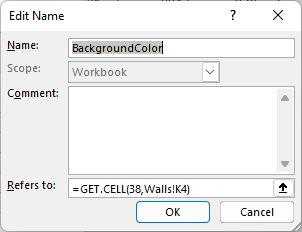
This formula will retrieve the value of the background color of the cell you are going to refer to and K4 is the cell we are going to pick the color from.
We set the empty column to have the General format.
Select an empty cell where you want to apply the formula to and select “Use in Formula”. Each value now represents a different background colour.
You can then use these values to ColorCode your model in BIM Query, or you can extend it into writing even more advanced formulas inside Excel for further analysis.
Before saving the Excel and importing it into Revit, please make sure to copy and paste the formula values as “values”.
Example 2: Check your Revit model by using IF sentences in Excel
For the purpose of this example, we want to identify all the electrical fixtures that have an elevation level of less than 400mm and apply a comment to them, so we can double-check them later.
We save the BIM Query spreadsheet into Excel.
First, we convert the “Elevation” values from text to numbers. And now we can write a simple IF sentence in the column for “Comments”.
=IF(G4>400,” “,”Wrong Height”)
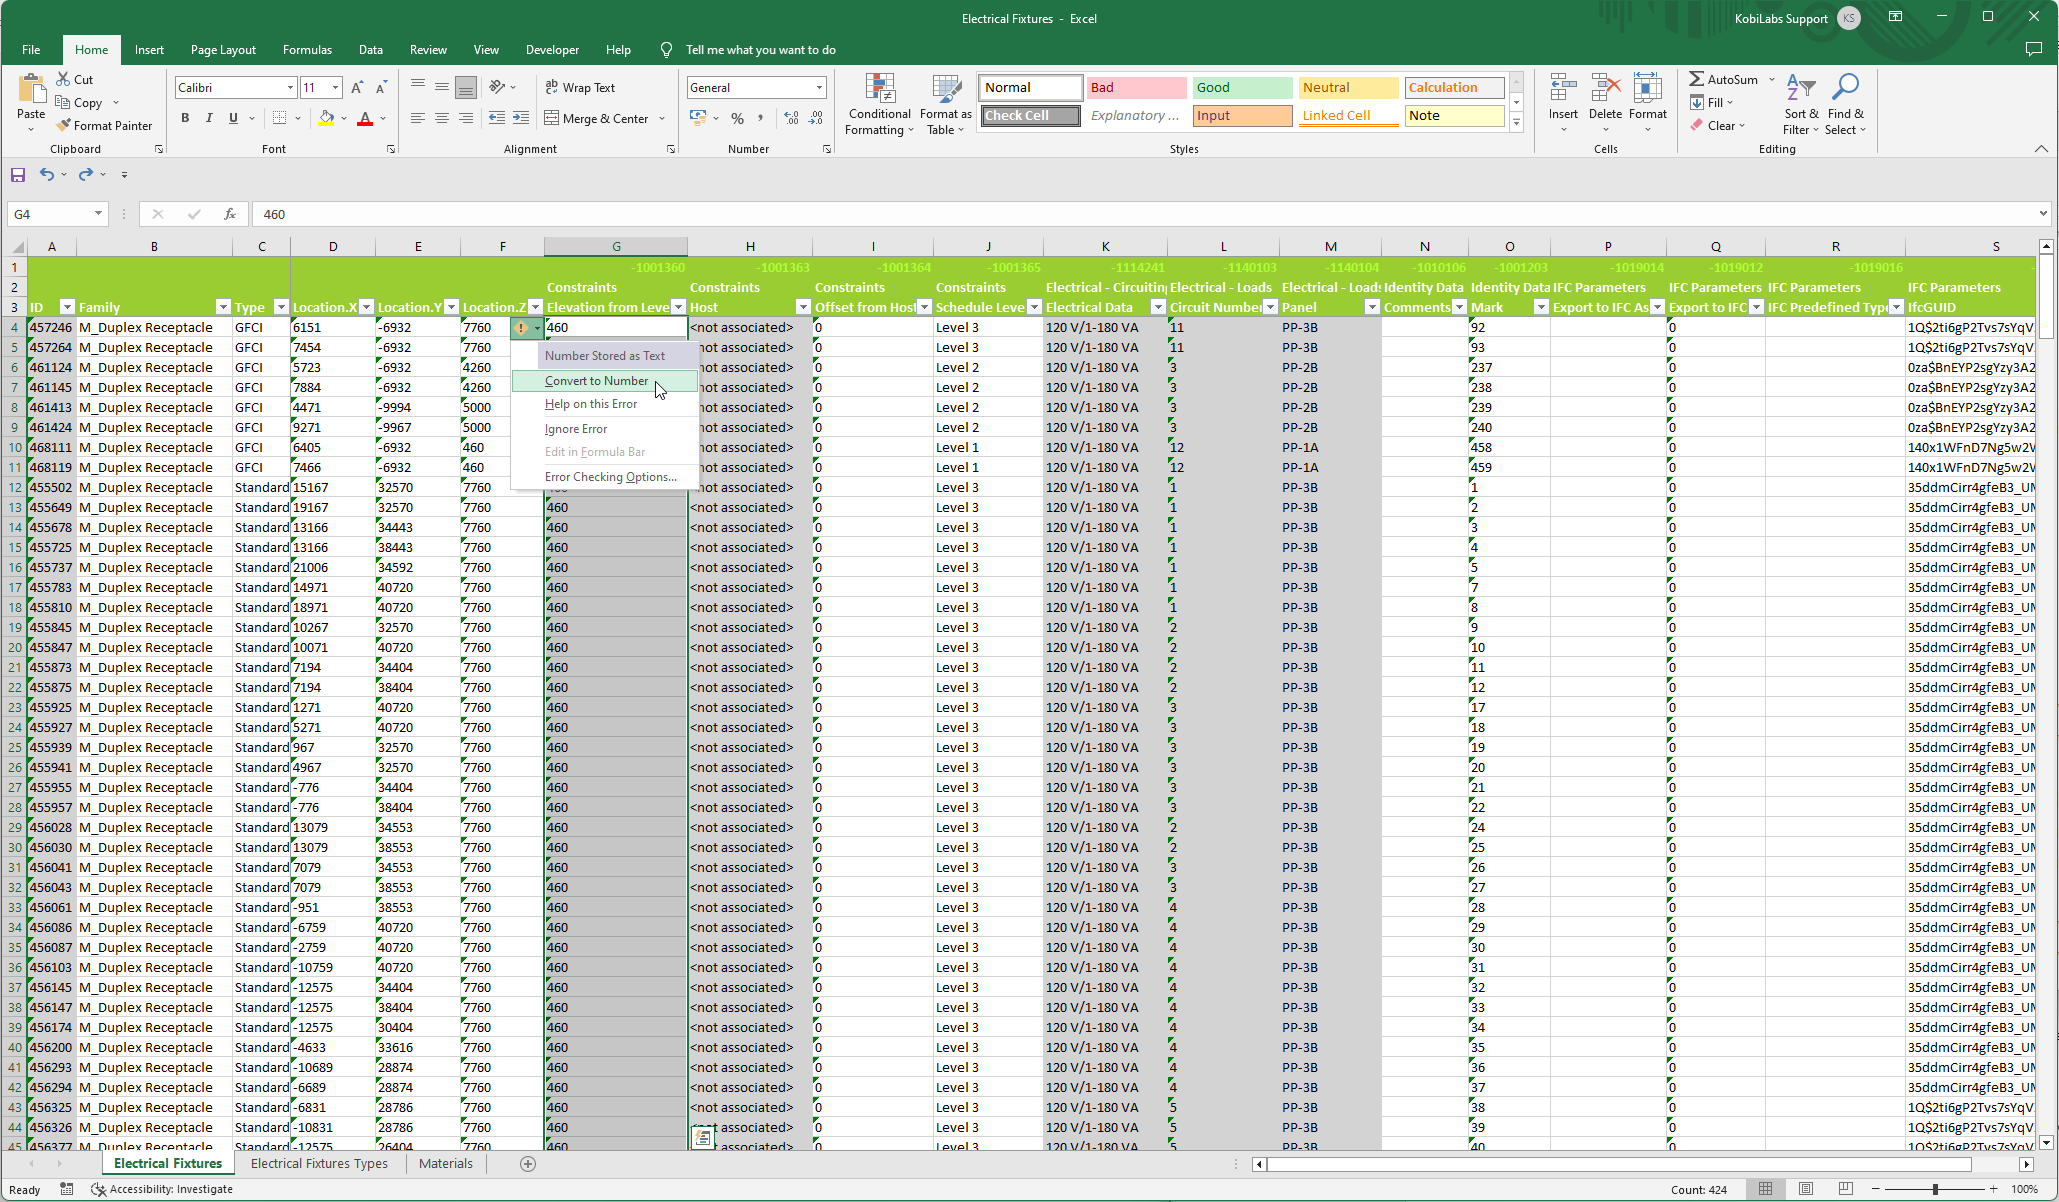
If the Elevation from the level is greater than 400, we will leave the comment box empty, otherwise, we will insert a comment “Wrong Height”. This way it will be easier to identify them.
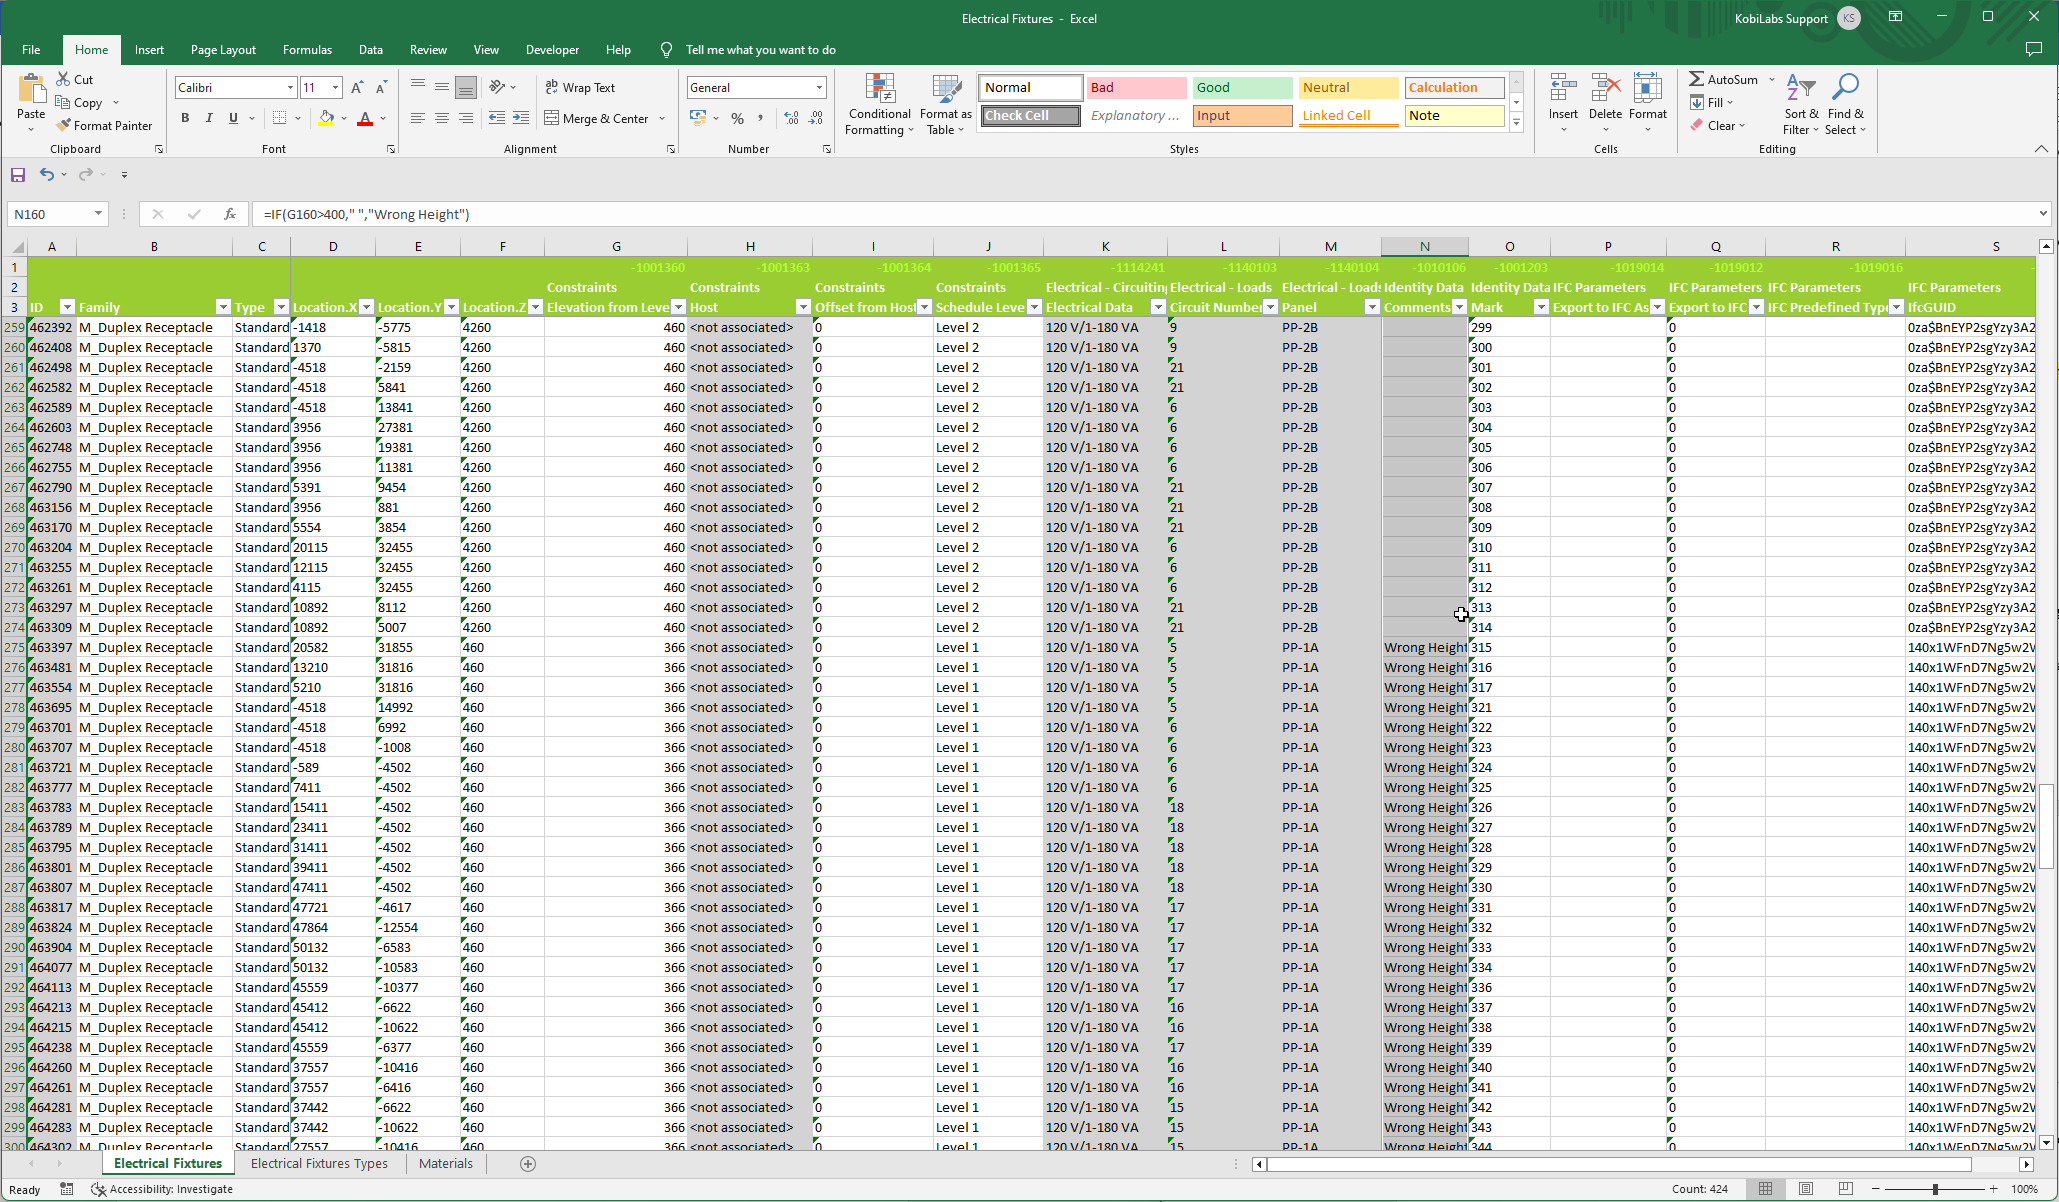
We open the Excel file in BIM Query. To quickly find the elements according to our criteria, we can again use the function for Color Coding.
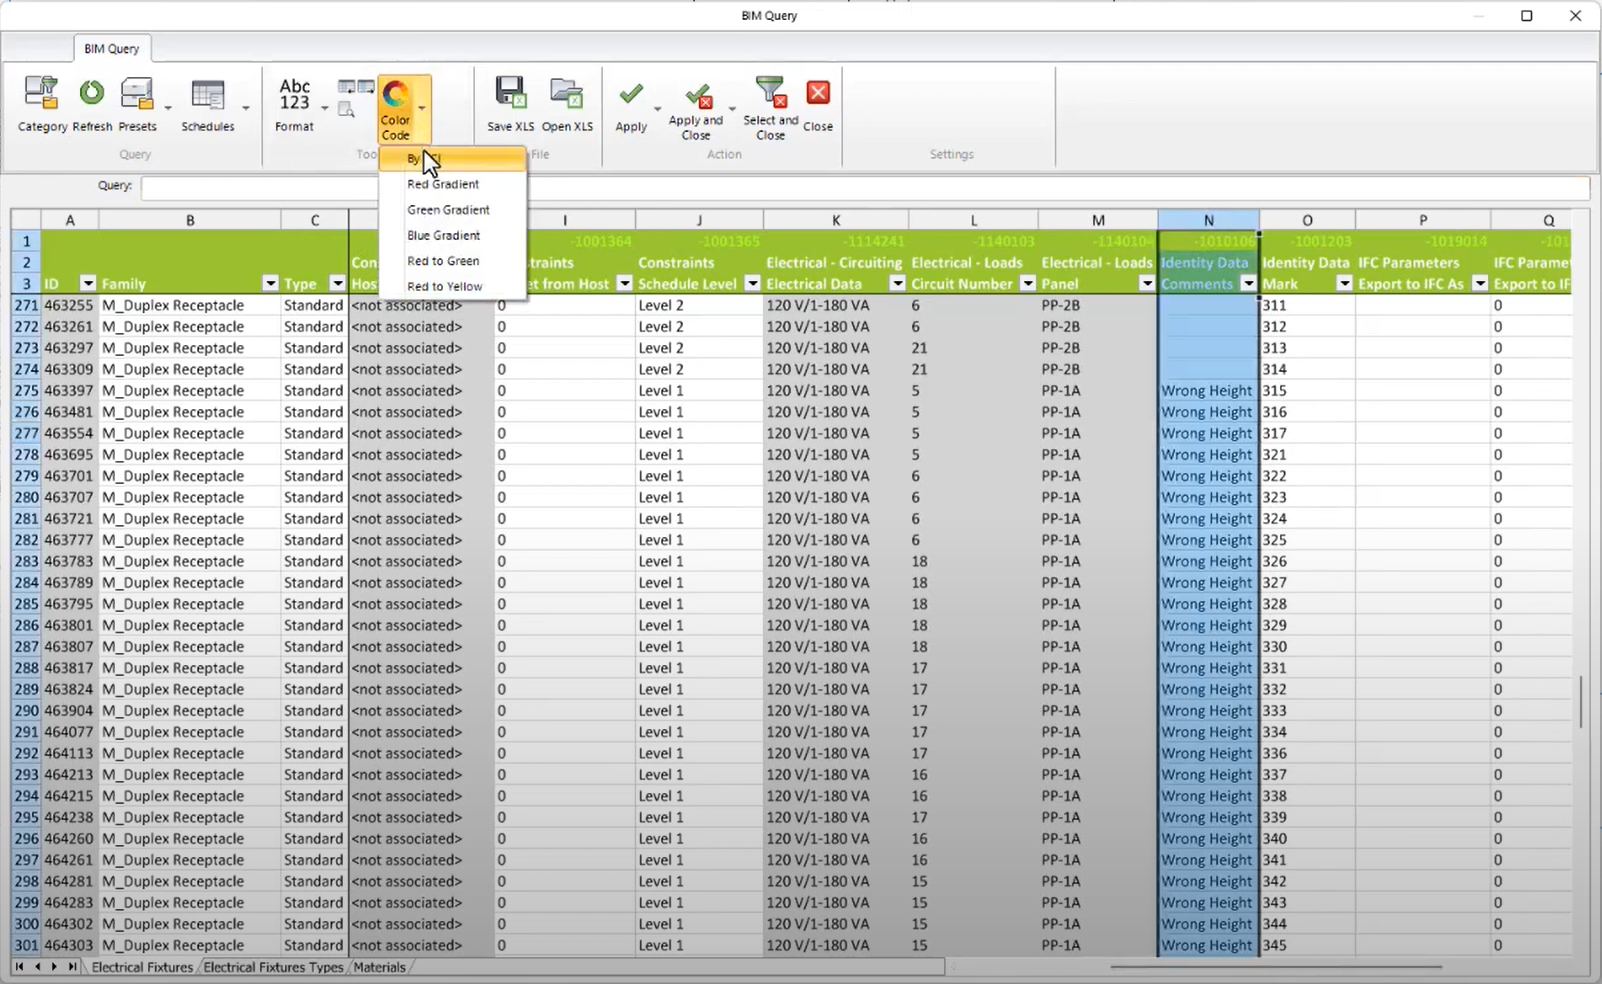
Select “Apply & Close”.
Now we can see that all the elements are color coded according to the set criteria and that the comments were successfully applied.
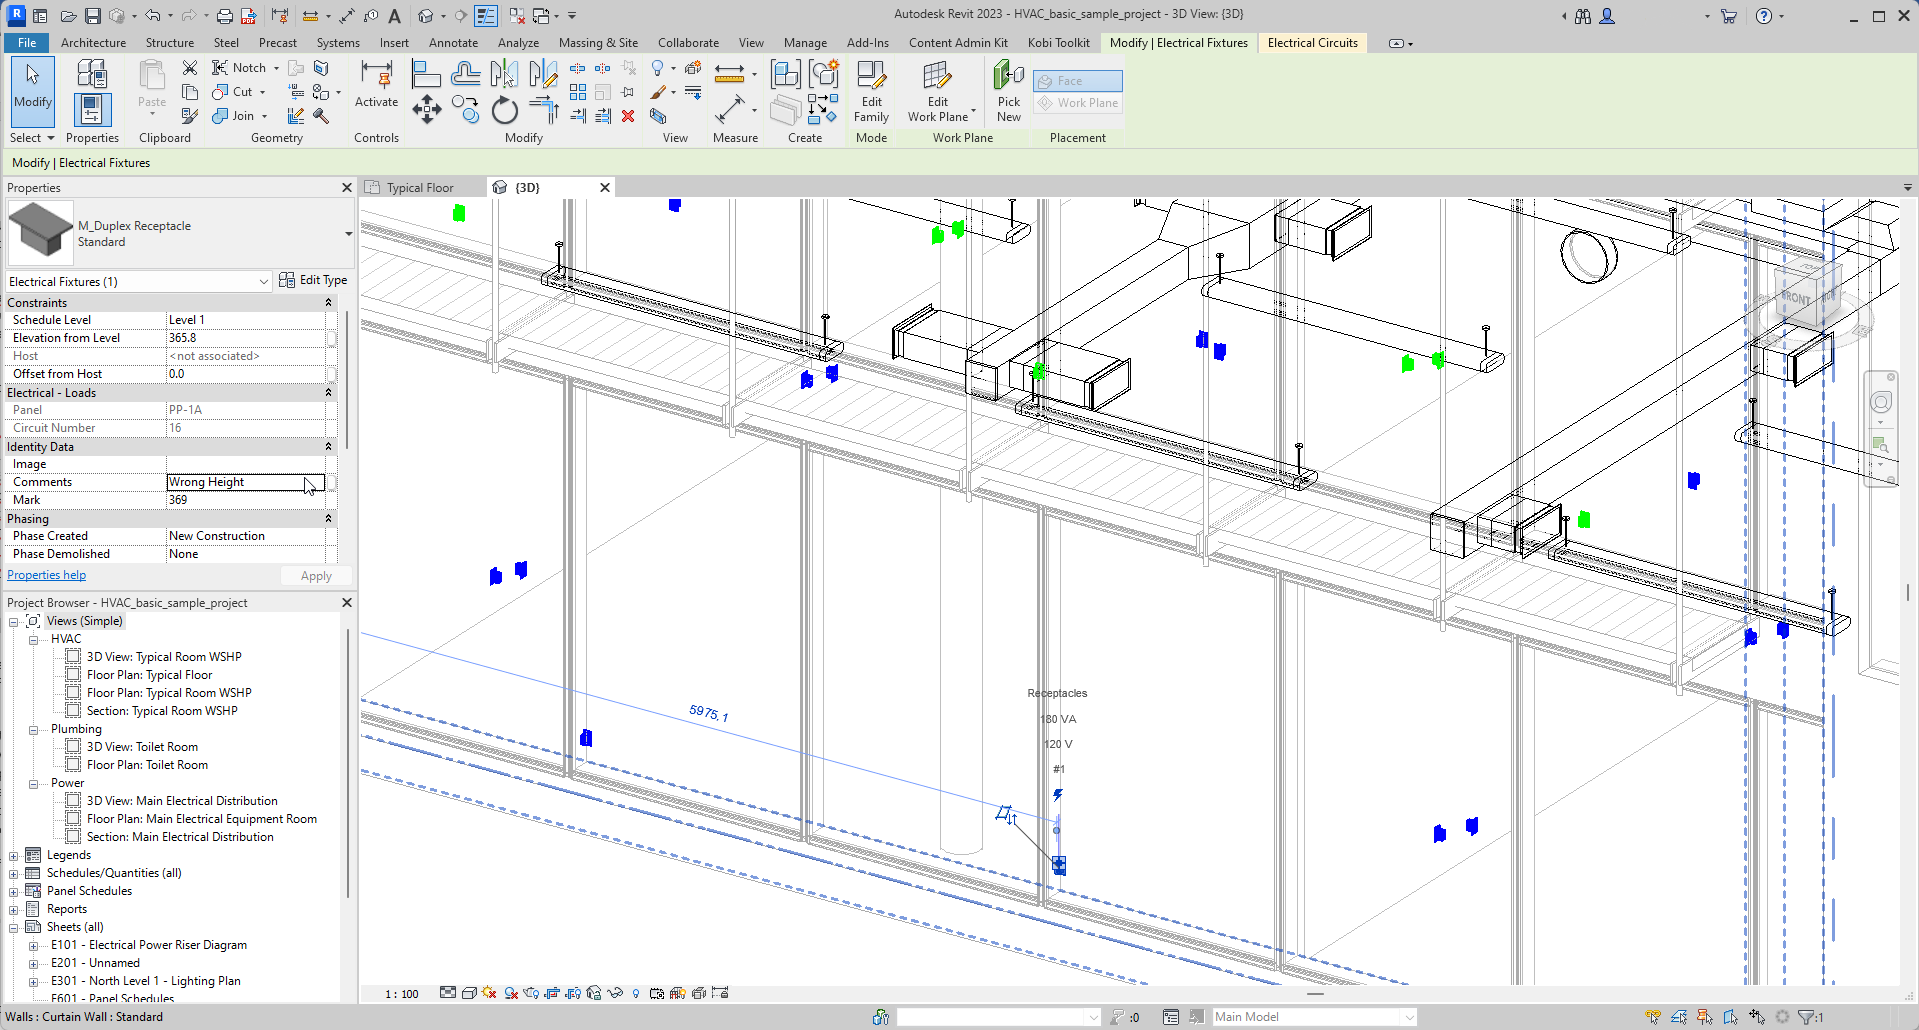
Check out more examples on how to use BIM Query:
Try it yourself and download a free trial of Kobi Toolkit for Revit.

