# Rooms

Practical set of tools for automating Room workflows.

- Room to Floor

Creates floors beneath selected rooms.
Displays a dialog with settings like boundary location or floor type. If specified, the tool adds the area under the doors, from the room to the floor.
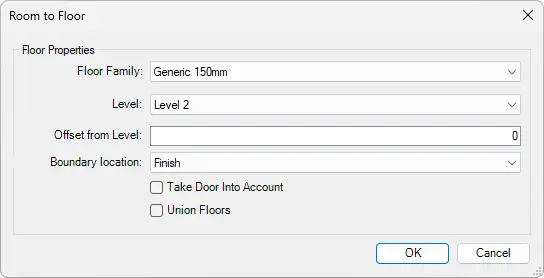
- Room to Floor Settings:
Floor Family - Displays a list of available floor families from the project.
Level - Displays a list of levels on which the floor will be created.
Offset from Level - Offsets floor from the level for the selected value.
Boundary location - Select how the floor boundary is placed relative to the wall (Center, Core Boundary, Core Center, or Finish).
Take door into Account - When enabled it creates a floor under the doors.
Union Floors - When enabled, connects multiple floors if they touch each other or if the corresponding rooms are connected by doors.
Select Rooms from your project > Go to Kobi Toolkit for Revit tab > Go to Modify panel > Click on Rooms dropdown > Select Room to Floor > Set up options in the dialog window > Click OK
- Room to Ceiling

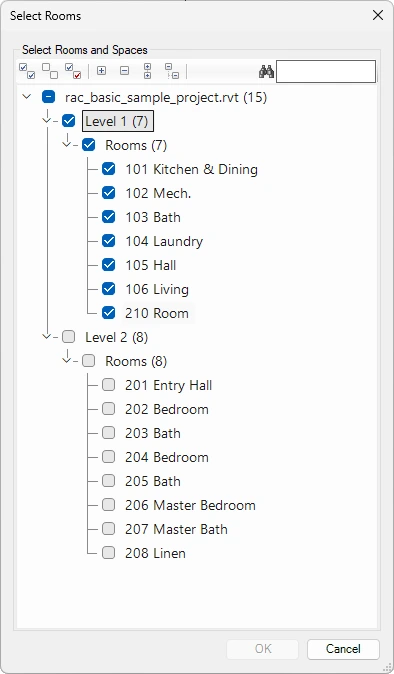
Creates ceilings for selected rooms. Rooms can be selected directly in the model or from the Select Rooms dialog. The tool creates a ceiling for each selected room, with control over ceiling type, position, and height.
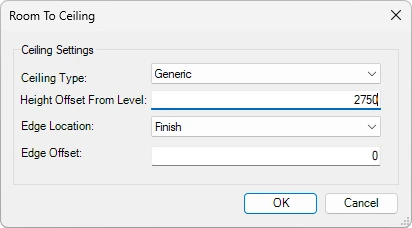
Room to Ceiling Settings:
Ceiling Type – Displays a list of available ceiling families from the project.
Height Offset from Level – Offset from room level (distance between floor to ceiling)
Edge Location – Select how the ceiling boundary is placed relative to the wall (Center, Core Boundary, Core Center, or Finish).
Edge Offset – Define edge offset from the wall.
Select rooms from your project or from the Select Rooms dialog box that opens after running the R_oom to Ceiling_ command > Go to Kobi Toolkit for Revit tab > Go to Modify panel > Click on Rooms dropdown > Select Room to Ceiling > Set up options in the dialog window > Click OK
- Room to 3D

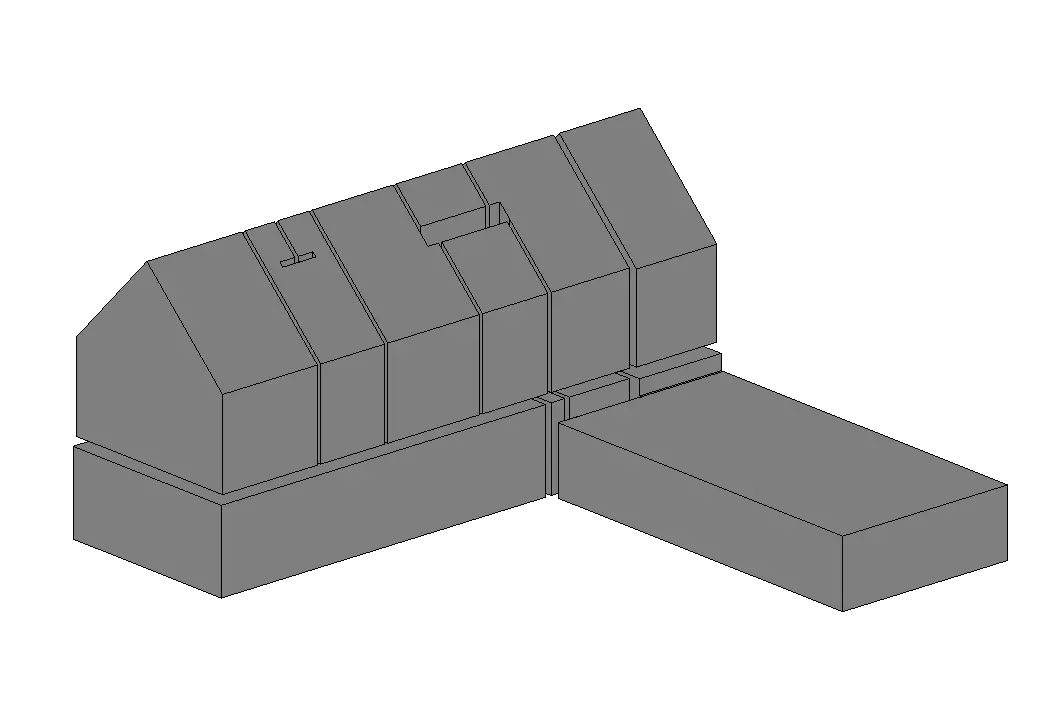
Creates 3D room volumes as Generic Model elements based on Rooms in the project. The generated 3D volumes help visualize spatial relationships, proportions, and room extents in the model.
The created 3D room elements include identity data, volume and phasing information, and IFC parameters. The tool also copies parameter values from the source Rooms to the corresponding 3D room elements.
Select one or multiple Rooms in the view or the entire model > Click on the Kobi Toolkit tab > Go to Modify panel > Click on Rooms dropdown > Select Room to 3D
Zoom To Room or Space

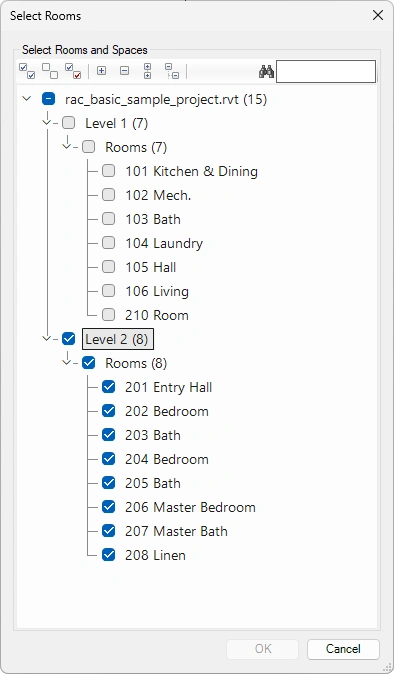
This tool displays a list of rooms and spaces in the current and linked projects. Choose an instance(s) to zoom the active view to it.
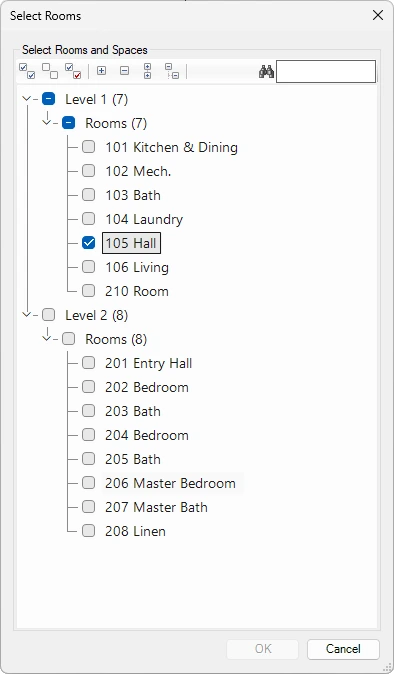
Use toolbar to:

Select all nodes
Deselect all nodes
Invert checked nodes
Collapse selected nodes
Expand selected nodes
Collapse all nodes
Expand all nodes
Search elements by name
Click on the Kobi Toolkit tab > Go to Modify panel > Click on Rooms dropdown > Select Zoom to Room or Space > Select rooms and/or spaces in the list > Click OK
Room Views

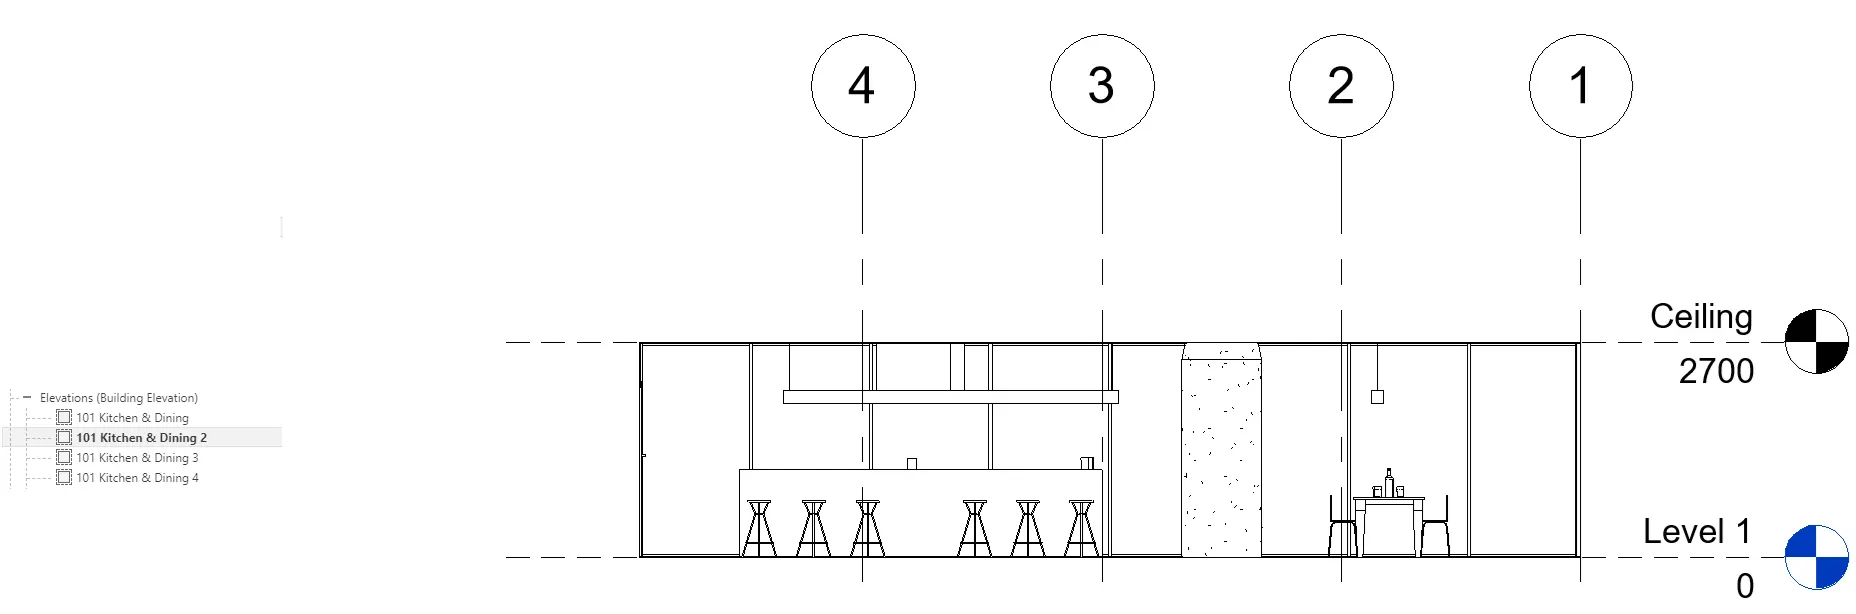
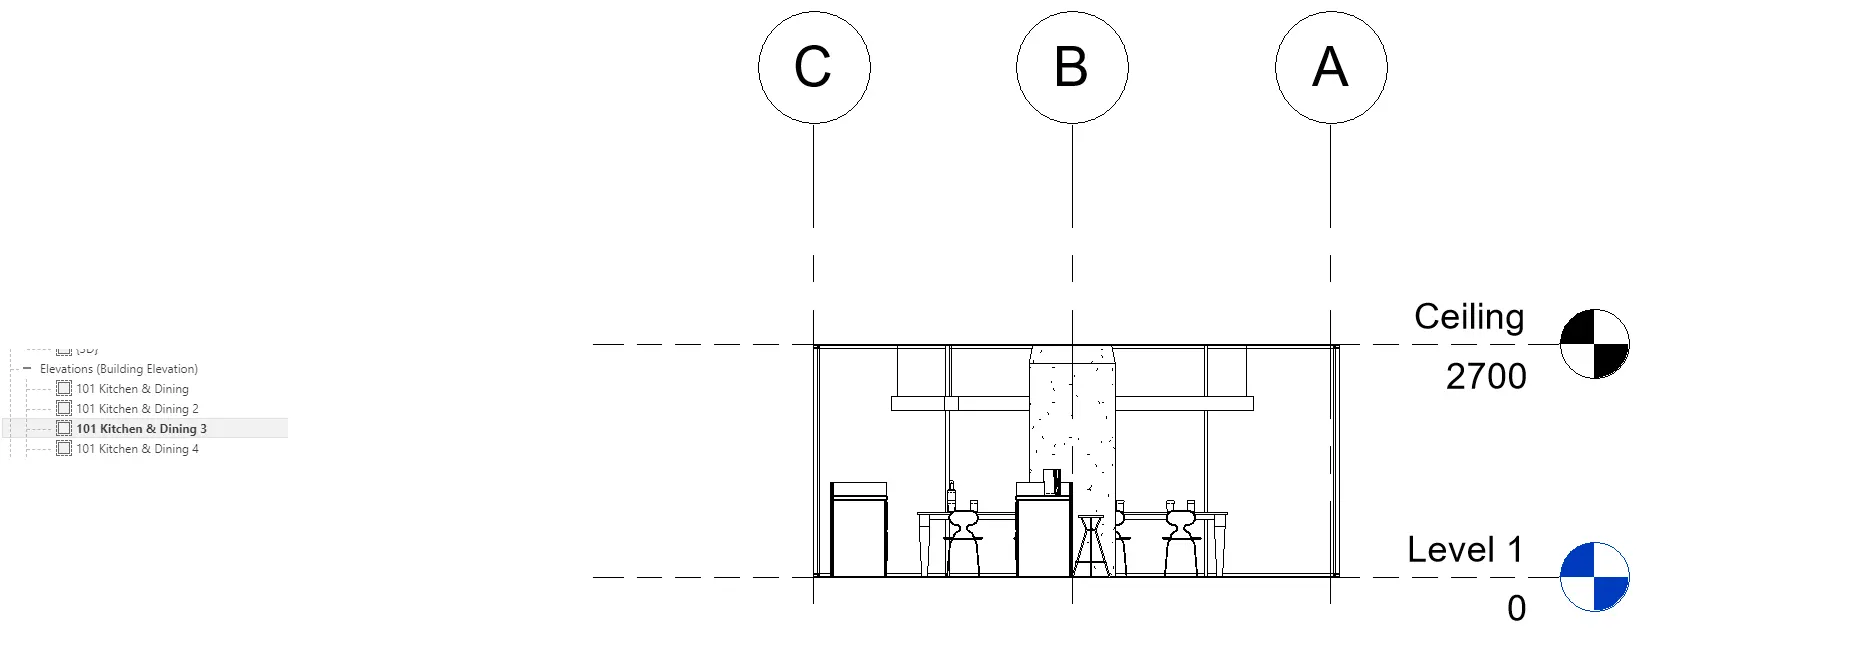
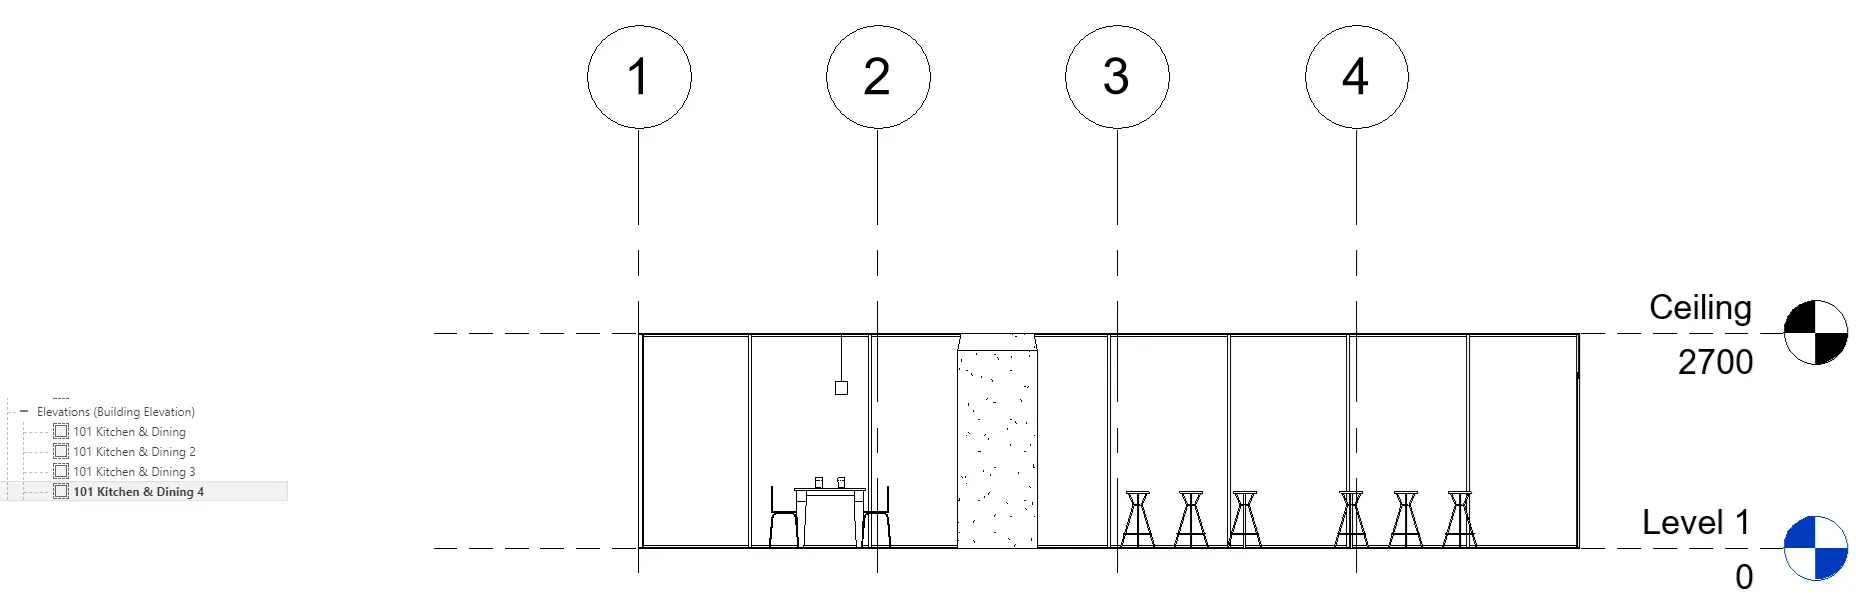
Creates new views based on selected rooms and defined properties. You can choose the view types to generate (plan, ceiling, 3D, elevation) and define view names. View properties (for example annotation crop) should be set before running the tool.
For each selected room, plan and ceiling views are created as dependent views, while 3D and elevation views are created as new views in the Project Browser.

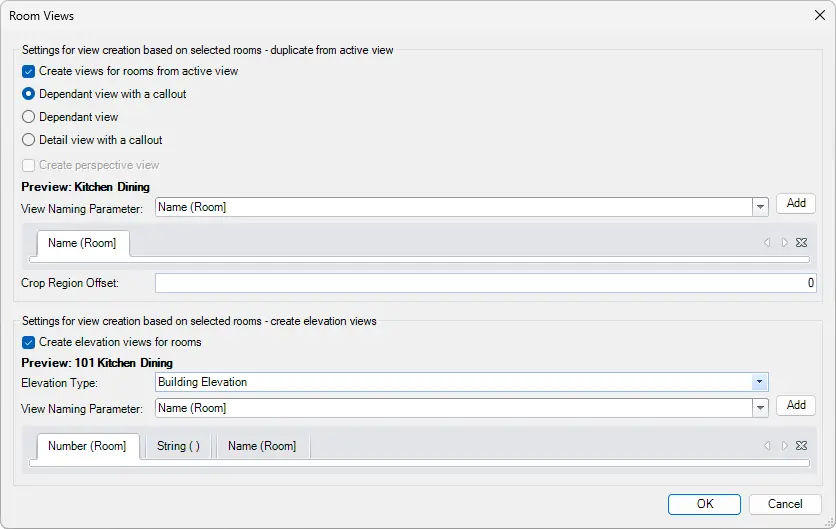
Settings for view creation based on selected rooms – duplicate from active view
- Create views for rooms from an active view - Check to create new views and select if you want to create them as:
- Dependant view with a callout
- Dependant view
- Detail view with a callout
- Create perspective views
- View Naming Parameter: Select the naming parameter from the list - Click Add
- Create views for rooms from an active view - Check to create new views and select if you want to create them as:
Settings for view creation based on selected rooms – create elevation views
- Create elevation views for rooms
- View Naming Parameter: Select the naming parameter from the list - Click Add (Example: Select Number (Room) > Add > select String > Add > Press space to have space as a string between parameters > Select Name (Room) > Add > Previews should show: Number Name)
- Crop Region Offset


Click on the Kobi Toolkit tab > Go to Modify panel > Click on Rooms dropdown > Select Room Views > Select Rooms set settings for room views > Click OK
Room Report

Room Report tool analyzes 3D models or Active View and displays elements grouped by room. The result includes families (e.g., doors, windows, furniture, …), floors, ceilings and walls.

Click on the Kobi Toolkit tab > Go to Modify panel > Click on Rooms dropdown > Select Room Report > Browse through Rooms
Room Lighting

The Room Lighting tool enables the user to calculate the volume of lighting for any room. Based on the square footage of a specific room, this tool calculates illumination as a percentage. It also provides an editable dialogue box where user can change the name and mark for the room.

Click on the Kobi Toolkit tab > Go to Modify panel > Click on Rooms dropdown > Select Room Lighting > Dialog box opens up, where user can review Room / Window size and a Room Lighting Percentagems
- DWG to Room Separations

Creates Room Separation Lines based on geometry from a linked DWG file. After selecting the DWG link and running the tool, a dialog displays the available layers that can be used to generate room separation lines.

Select DWG link > Click on the Kobi Toolkit tab > Go to Modify panel > Click on Rooms dropdown > Select DWG to Room Separations > Select layer that you want to use for Room separation > Click OK
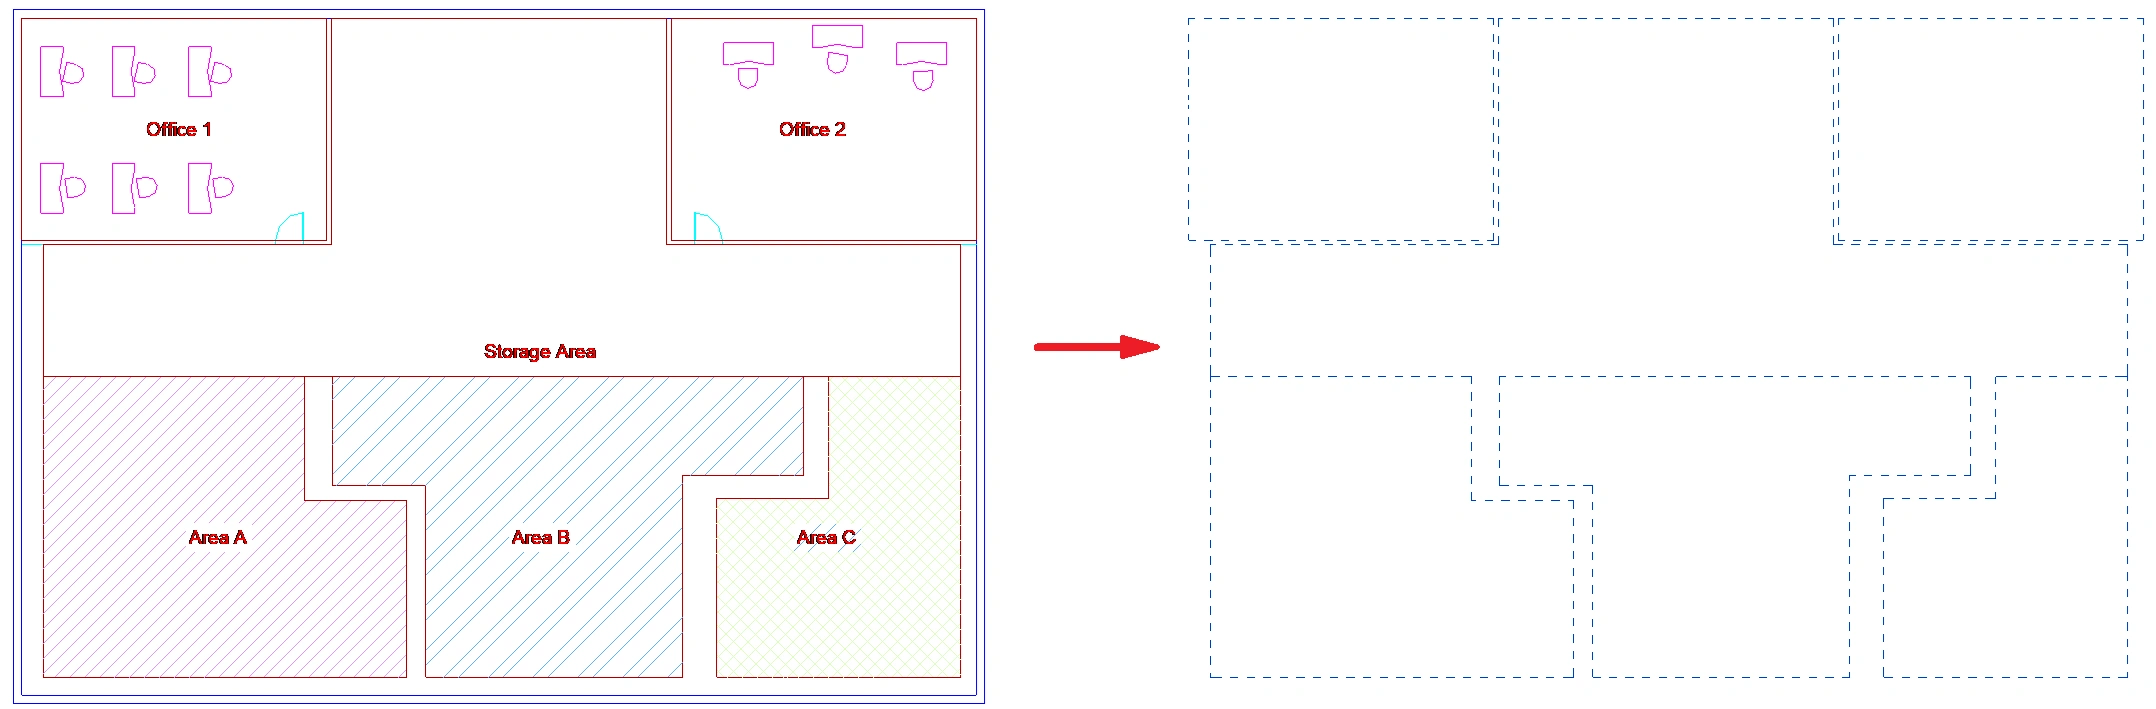
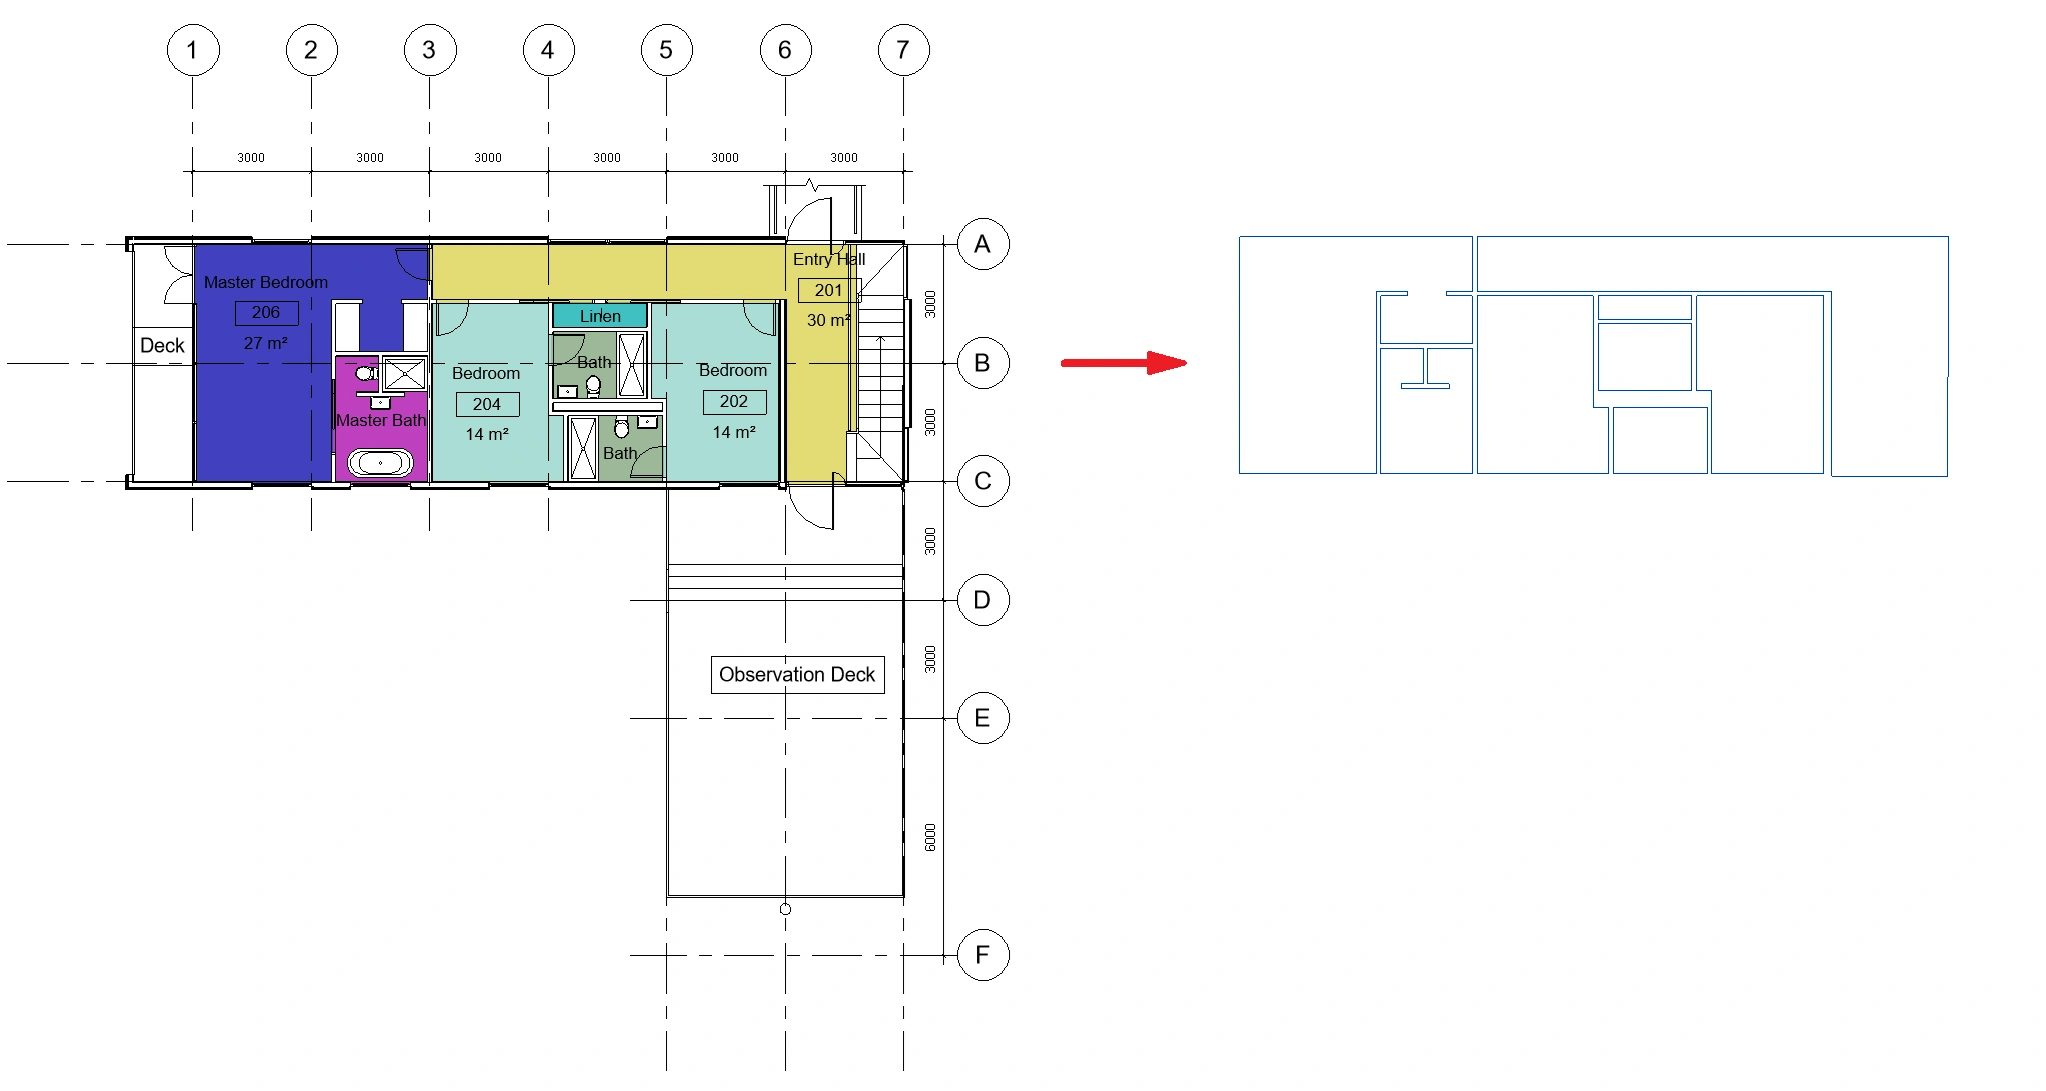
Room to Lines

Converts the geometric edges of selected rooms into either Detail Lines (for 2‑D documentation) or Model Lines (for 3‑D modeling).
Use toolbar to:
Select all nodes
Deselect all nodes
Invert checked nodes
Collapse selected nodes
Expand selected nodes
Collapse all nodes
Expand all nodes
Search elements by name

Settings:
Detail/Model Lines Type – Select if you want lines to be drawn with Detail or Model lines.
Line Type – Select the line type from the list of options.
Edge Location – Select how the line boundary is placed relative to the wall (Center, Core Boundary, Core Center, or Finish).
Click on the Kobi Toolkit tab > Go to Modify panel > Click on Rooms dropdown > Select Room to Lines > Select Rooms > Define settings > Click OK
Center Rooms

A tool automatically moves the center point of any selected room to its true geometric centroid.

Select Rooms > Click on the Kobi Toolkit tab > Go to Modify panel > Click on Rooms dropdown > Select Center Rooms
← Legend Multi Join →