# QA - Model Review
Tools for quality assurance and quality control in a project.

Click on the Kobi Toolkit tab > Go to QA/QC panel > Click on QA > Model Review
# QA/QC Tags 
This tool allows you to review whether the instances of a certain category are tagged or untagged in active view. You can also select a specific category with a tag and modify it.
Under Category choose the category you would like to review.


Choose a category and define what you would like to review.
By clicking on the selection of category, you can define and find Untagged Instances of selected Category in a project or Tagged Instances. On option Tagged Instances and Tags, you can find not only the Instances that are tagged but also their Tags.

Kobi Toolkit tab > Go to QA/QC panel > QA - Model Review drop-down > Select QA/QC Tags > Select Untagged Instances / Tagged Instances or Tagged Instances and Tags
# Create Tags 
The tool allows you to automate creating tags of specific Categories in selected views. You can define a Tag Family, its orientation and apply it to all instances in the view.
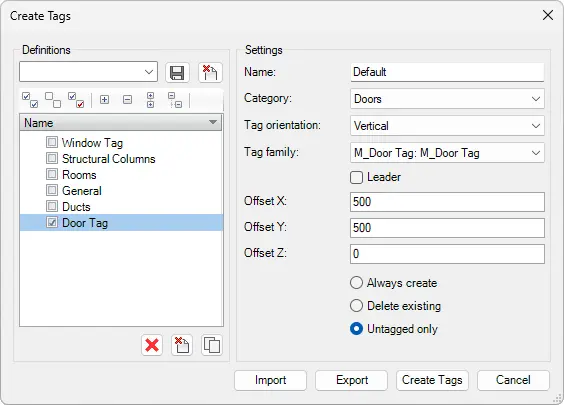
- Definitions

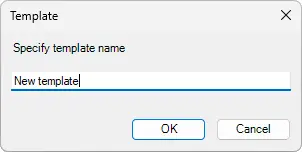
Tag Templates are made of different tag definitions. Check tag definitions, that you want to join under the Tag Template, and select the Save  button. The Template dialog box appears. Specify the template name and select OK.
You can delete the selected Tag template by selecting Delete  button.
Tag definitions are defined in the Settings section of the dialog box. You can define Name, Category, Tag orientation, Tag Family, Leader, and Offsets for every tag definition.

Use buttons to
 :
:- Delete all tag definitions
- Delete selected tag definitions
- Duplicate selected tag definition
Settings
Define Name, Category, Tag orientation, Tag Family, Leader, and Offsets for every tag definition. You can select if you want to create new tags on top of existing ones (Always Create), delete existing tags before replacing them with new ones (Delete Existing), or tag only the untagged category elements (Untagged only).
Create Tags tool also allows you to Import/Export Definitions into/from a .json file.
Kobi Toolkit tab > Go to QA/QC panel > QA - Model Review drop-down > Select Create Tags > Select Name > Select Category > Select Tag Family > Click Create Tags
# Toggle Transparency 
Toggle transparency for picked instances - run the tool and select instances. You can set the opacity in the settings dialog. The instance remains transparent until you click on it again.

Kobi Toolkit tab > Go to QA/QC panel > QA - Model Review drop-down > Select Toggle Transparency > In active view click on elements you want to toggle transparency of
You can customize the percentage of transparency in Settings. Go to the Kobi Toolkit panel, and click on Settings. The Settings dialog box comes up, where you can find additional Toolkit Settings. In the right-bottom part, you can enter the value of the percentage for Toggle Transparency and press OK. This value will be used until you change the settings.

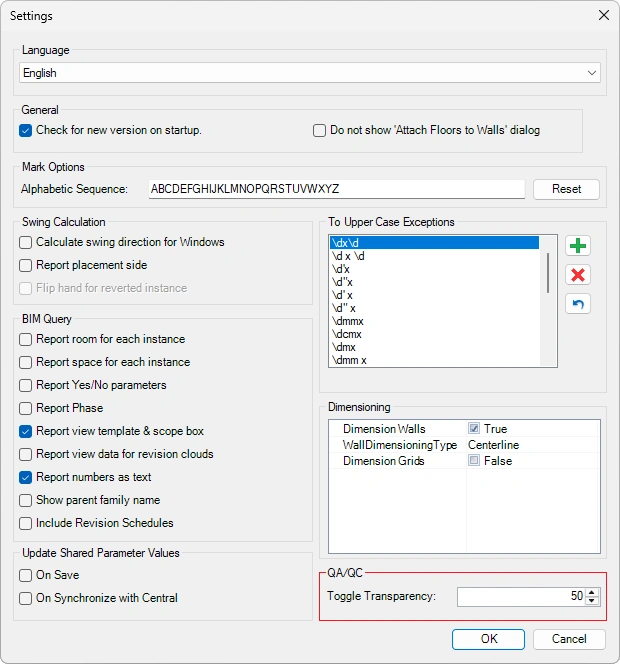
Kobi Toolkit tab > Go to Kobi Toolkit panel > Settings > QA/QC Toggle Transparency > Define the percent of transpareny to use in tool.
# Revision Cloud Selected Elements 
Creates a revision cloud that automatically wraps around selected elements across all relevant sheets.
Select the elements you want to revise and run the command. In the dialog, choose the revision number (based on Sheet Issues/Revisions) and add a comment. After confirming, the revision cloud is created on all sheets where the selected elements appear. The comment is stored in the revision cloud properties.

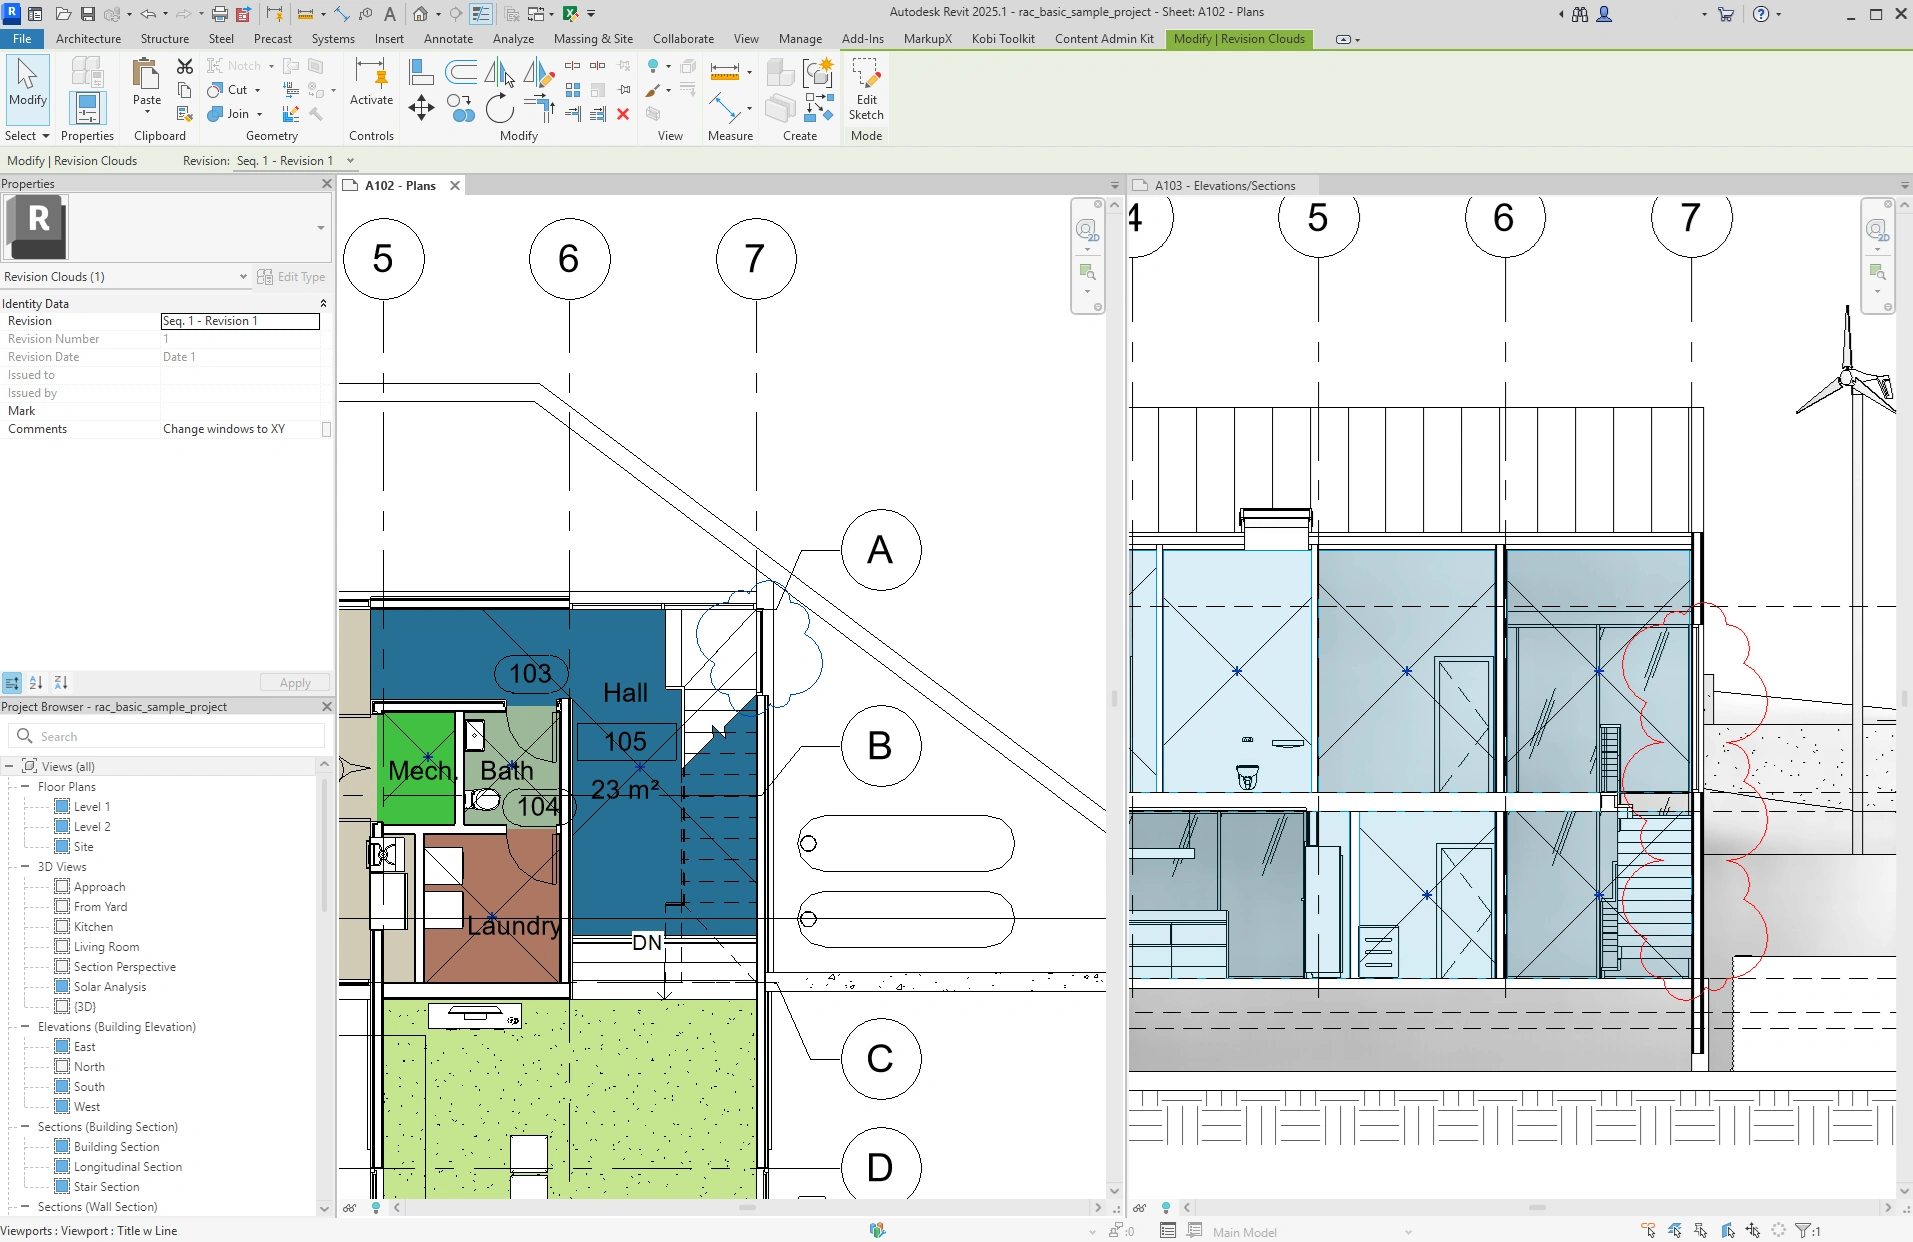
Select element or elements around which you want to draw a revision cloud > Go to Kobi Toolkit tab > Go to QA/QC panel > QA - Model Review drop-down > Select Revision Cloud Selected Elements > Select Revision, optionally add Comments > Confirm your choice by clicking on Draw