# Guide Signs
Command Description
This command is intended to create a new Board/Guide Sign, to which we add elements such as Texts, Arrows, Inserted Signs and Symbols. Boards/Guide Signs are defined as dynamic CAD blocks whose dimensions can be edited either through the Properties palette or by moving the grip in the drawing. Some boards contain “Visibility States” for the actual dimensions of the boards, in accordance with the applicable regulations. Elements such as Arrows can also be edited so that they show the actual state of traffic management on the board. Other elements, such as arrows, in addition to "Visibility States" also contain "Action Parameters" so that they can be edited to show the actual state of traffic management.
To insert a new empty Board
- Click Kobi Signs and Stripes tab > Traffic Signs panel > Guide Signs
 .
.
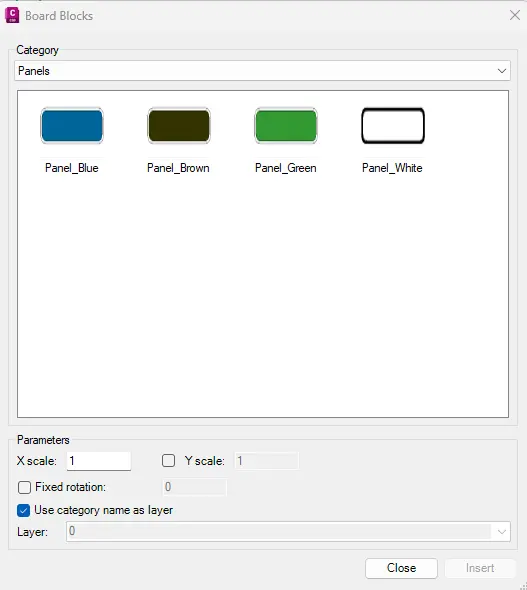
Select the appropriate panel from the “Category” drop-down list.
Specify the Parameters:
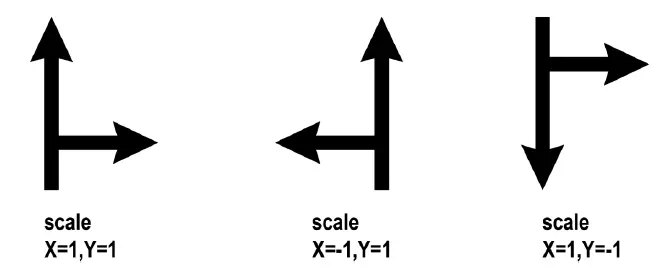
X and Y scale – specify the scale of the selected Board (or the other selected element).
Fixed rotation – optionally select the checkbox and specify the rotation angle.
Use the category name as layer – select the checkbox, to assign element to the layer with the corresponding category name.
Layer - Uncheck the “Use category name as layer” option and select the Element layer from the “Layer” drop-down list. Or type the new layer name in the field.
- Specify Element insertion point or select one of the following options:
mirrorX – scale element by X = -1,
mirrorY – scale element by Y = -1.
Click the “Insert” button in the “Board Blocks” dialog and specify board insertion point in a drawing.
Specify the rotation angle (if it wasn’t specified in the dialog).
Once the Board is inserted, you can edit the Height and Width of the Board by moving the grips or by entering dimensions in the Properties palette.
To add elements on the Board
Follow the steps in the previous section to insert an empty Board.
Click Kobi Signs and Stripes tab > Traffic Signs panel > Guide Signs
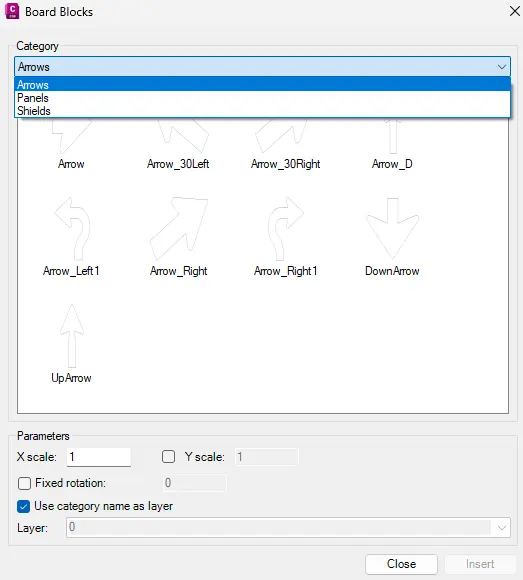
Select the appropriate element from the “Category” drop-down list to attach to a Panel. The following elements can be attached to the Panel: Arrows and Shields.
Note that you can also create Texts and MTexts on Boards as shown in the figure below. Change Text Properties like Layer, Height, Color, etc. in the Properties palette.
Specify parameters as described in the previous section – “To insert a new empty Board«.
Specify element insertion point on the Board.
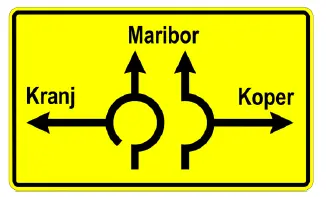
- Select the element in a drawing. Click on the “Visibility States” grip to select the other variant of the element. Figure below shows different visibility states of the same Arrow:

Use dynamic Linear (Stretch) grips to extend the Arrow Length or Type Dimension in the Properties palette. Use Rotation grips to create appropriate arrows based on the actual traffic situation.
Add Texts/MTexts on Boards. Change Text Properties like Layer, Height, Color, etc. in the Properties palette.